Health

Lightweight Home Exercises To Lose Arm Fat

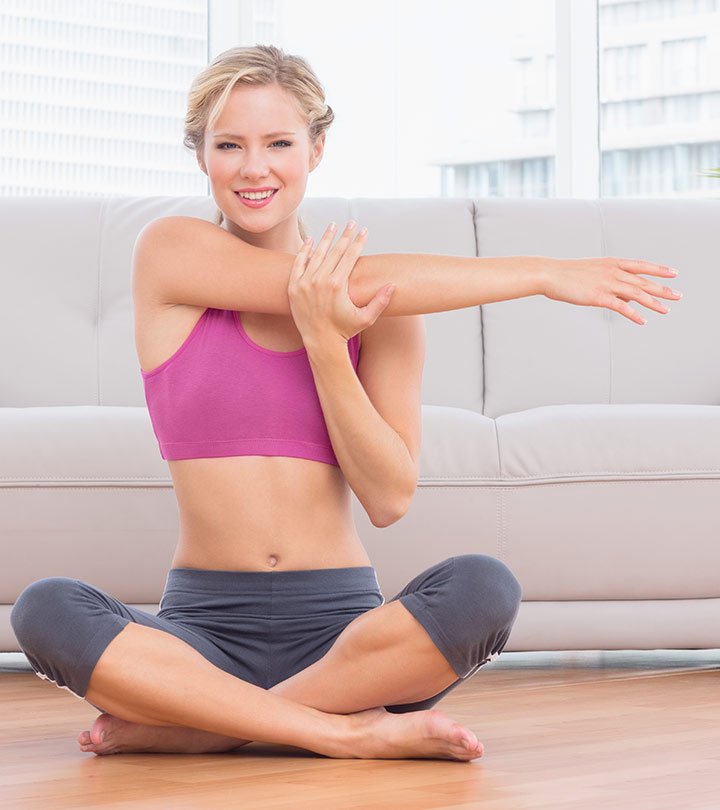
15 Lightweight Home Exercises To Lose Arm Fat

If you are looking for ways to lose arm fat in a hassle-free manner then try the following 15 exercises that you can practice at home and get excellent results.

  1. Arm Circles (Warm-up)
Arm Circles

Steps:

• Stand straight and raise your hands laterally

• Start moving your hands first in clockwise and then anticlockwise motion but without bending your elbows

• Do 10 reps of each direction and complete 3 sets of 10 reps

  1. Wall Push-ups
Wall Push-ups

Steps:

• Stand before a wall at an arm’s length and place your hands on the wall

• Keep your hands shoulder-width apart and legs stationary to start the push

• Push your body towards the wall by bending your elbows and then come back

• Do 3 sets of 10 reps each

  1. Push-ups
Push-ups

Steps:

• Lied down on a mat and raise your body on your palms and toes

• Keep your hands shoulder-width apart and legs slightly wider than your hips

• Push the body down with the force of your elbows but prevent touching the mat and then come back to the first position

• Keep your neck, spine, and legs in a straight line while doing the push-ups and do 3 sets of 8-10 reps each

  1. Tricep Dips
Tricep Dips

Steps:

• Take a bench and sit with your back towards the bench

• Flex your knees with your feet flat on the ground and extend your arms backward to hold the bench

• Raise your hips and take two steps forward to balance your body

• Lower your hips but don’t touch the mat and raise your hips again when you are about to touch the mat

• Do 3 sets of 10 reps each

  1. Inchworm

Steps:

Inchworm

• Stand straight with your feet closed and bend down to touch your feet without bending your knees

• Now start moving your hands forwards without flexing your knees and continue until you reach a plank position

• Start moving towards your hands and stop when your feet touch your hands and do 3 sets

  1. Floor Dips
Floor Dips

Steps:

• Sit on a mat with your knees flexed and feet firmly placed on the floor

• Take your arms and put your palms flat with fingers pointed towards your hips on the floor

• Lift your body until your arms are fully extended and then come back but don’t touch the floor

• Complete one set of 10 reps and do 3 sets

  1. Plank Up-Downs
Plank Up-Downs

Steps:

• Come down on your hands with your palms flat on the ground and taking all the weight

• Stretch your legs backward and keep your head straight to bring your neck, spine, hips, and legs in a straight line

• Now fold your right elbow and bring the right forearm on the ground by supporting it with the left hand

• Repeat it with the left hand to come on the elbow plank position

• Go back to the first position and do 3 sets of 10 reps … Find more

Push-Ups Women Should Practice

10 Push-Ups Women Should Practice

Women looking for a complete exercise that works for all the body should look no further than push-ups. And there are plenty of push-up styles they can choose from.

Here’re the 10 best push-ups that women can practice at home and get benefits

  1. Knee Push-Ups

Steps:

Knee Push-Ups

• Come down on all your fours on an anti-slip mat. Keep your knees together but hands up to shoulder length apart

• Look down without tucking your head. Your hips, spine, and head should be in a straight line. Cross your legs to start

• Tuck in your stomach to engage your core and bring your chest towards the floor but stop before touching the mat

• Pause for a moment and push your body again for the nest rep. Do 3 sets of 8 reps each

  1. Wall Push-Ups

Steps:

Wall Push-Ups

• Stand against a wall at an arm’s distance and keep your legs hip-width apart and straight

• Flex your palms in the wall and bring your hands slightly broader than shoulder-width to start

• Straight your neck and engage your core and start pushing your chest towards the wall without bending your hips

• Your neck, spine, glutes, and legs should make a straight line during the exercise

• Bring your chest closer to the wall but don’t touch it. Take a pause and come back to the starting position

• Do 3 sets of 5 reps each

  1. Incline Push-Ups

Steps:

Incline Push-Ups

• Bend down on a bench with your palms firm on the bench, hands shoulder-width apart, neck straight, and legs stretched back

• Close your legs, tuck in your stomach, and bring your neck, spine, and legs in a straight line for push-ups

• Lower your chest towards the bench and stop before touching. Take a brief pause and come back to the starting position

• Do 3 sets of 5 reps each

  1. Regular Push-Ups

Steps:

Regular Push-Ups

• Lie down on your stomach and bring your hands close to your chest and legs hip-width apart

• Stretch your legs and curl in your toes to push your body up. Here your neck, spine, hips, and legs will be in a straight line

• Take a brief pause and bring your chest down but don’t touch the floor

• Make sure your body remains in a straight line while doing the push-ups and do 3 sets of 5 reps each

  1. Decline Push-Ups

Steps:

Decline Push-Ups

• Take a robust box and sit down on your knees with the box on your back

• Place your hands firm on the floor and keep your hands wider than shoulder-length

• Stretch your legs back one by one and place your feet on the box to start

• Push your chest down to the chest and stop before touching the floor

• Pause for a moment before coming to the first position and do 3 sets of 5 reps each

  1. Diamond Push-Ups

Steps:

Diamond Push-Ups

• Come down on your knees and make a diamond with your thumbs and … Find more

Hip Thrust Exercises For Rounder Butt

5 Hip Thrust Exercises For Rounder Butt

If you want to improve your butt in size and strength then start doing hip thrust exercises. These are ultimate glute-strengthening exercises that can make your hips rounder and firmer. Also, they can lower back pain by reducing hip flexor inflammation. These activities also improve posture and sports performance.

What are hip thrust exercises?

hip thrust exercises

Invented by Bret Contreras, hip thrust exercises are similar to bridge exercises but they are more advanced and effective in giving results. While both hip thrust and bridge exercises help in strengthening the lower back and thighs, the former are more challenging as they involve pushing the weight with hips and glute muscles. For weight, you can use dumbbells, barbells, and chains.

There are 5 different hip thrust exercises you can do at home and with little help if you aren’t using weight. Also, there is little need to use a heavyweight that you are unable to push on your own.

  1. Hip Thrust With Resistance Band
Hip Thrust With Resistance Band

• Take a bench and place two dumbbells on either side of the bench and tie them with a resistance band

• Slide underneath the band and sit with your back firmly on the bench and knees bent with feet flat on the floor

• Extend your arms sideways on the bench and keep your head in the neutral position

• Engage your core and lift the dumbbells with your hips but don’t tuck your chin

• Hold the dumbbells in the lifted position for a couple of seconds before lowering them down. Do 3 sets of 12 reps with 10 seconds resting time between each rep

  1. Dumbbell Hip Thrust
Dumbbell Hip Thrust

• Sit down with your back placed on a bench with dumbbells in both hands. Your knees should be bent and feet should be firm on the floor

• Place dumbbells in the pelvic region for starting

• Push your hips up with the help of your heels. Let your back move over the bench for support

• Hold the position for a brief period and lower your hips but avoid touching the floor

• Do 3 sets of 10 reps with 10 seconds resting time between reps

  1. Barbell Hip Thrust
Barbell Hip Thrust

• Sit in front of a bench with your upper back resting against the bench

• Place a barbell in your pelvic region and bend your knees with your legs shoulder-width apart and feet flat on the floor

• Hold the barbell and push your hips towards the ceiling. Push your body with your feet and the upper back and look towards the ceiling

• Hold the position for a second and lower your back to complete a rep. Do 3 sets of 10 reps with 10 seconds rest between reps

  1. Single Leg Hip Thrust
Single Leg Hip Thrust

• Sit on the floor with your back resting against an exercise bench and knees bent

• Extend your right leg and push your hips up with your left leg and with support from your upper back

• Hold this position for a … Find more

Dumbbell Exercises Women Get Strong Shoulders

15 Dumbbell Exercises Women Should Do To Get Strong Shoulders

Tone up your shoulders if you want to look attractive, correct your posture, and look more confident. Also, shoulder exercises will reduce the risk of shoulder pain and injury in the long run. And you can easily make your shoulders stronger by practicing the following exercises.

  1. Lateral Raises
Lateral Raises

Stand straight with dumbbells in each hand and legs shoulder-width apart

Roll your shoulders towards your back and bend your elbows slightly to start

Lift your arms to bring them into a straight line with your shoulders and lower them down slowly and do 3 sets of 12 reps each

  1. Dumbbell Front Raises
Dumbbell Front Raises

Stand straight with dumbbells in your hands and your hands resting on your thighs

Raise your right hand to the shoulder level and stop for a couple of seconds and bring it down slowly

Do it with your left hand and do 2 sets of 12 reps

  1. Reverse Fly
Reverse Fly

Stand straight with dumbbells in both hands and your legs closer up to shoulder length

Bend forward at a 45-degree angle by bending your knees slightly and let your hands hang down

Lift your arms until your arms come in a straight line and pause for a moment

Lower your arms slowly and do 3 sets of 8 reps

  1. Shoulder Shrugs
Shoulder Shrugs

Stand straight with your hands on sides and legs closer

Hold dumbbells in each hand and keep your core tight and roll your shoulders to start the exercise

Raise your shoulders to the height of your ears and lower the shoulders slowly and do 3 sets of 12 reps

  1. Standing Shoulder Press
Standing Shoulder Press

Stand straight with your legs shoulder-width apart and dumbbells in both hands

First, lift the dumbbells to your ears by extending your arms upwards, and then raise the dumbbells over your head by raising your hands towards the ceiling

Hold the dumbbells over your head for a short time and then bring your hands down to the starting position and 2 sets of 15 reps

  1. Bent Arm Lateral Raises
Bent Arm Lateral Raises

Stand straight with your hands by your side and legs shoulder-width apart

Hold dumbbells in both hands and bend your elbows to bring your forearms in the 90-degree angle to your arms

Bend your knees slightly to support your back and to start the exercise

Your forearms should be attached to your chest and arms locked

Life your arms up to the shoulder height, stop for a while, and bring your arms slowly to the starting position and do 2 sets of 15 reps

  1. Side Plank
Side Plank

Lie down on your side with your forearm in 90-degree and arm extended on the floor

Your body weight would be on your shoulder and the forearm in the starting position

Life your hips off the floor until your body from neck to toe comes in a straight line

Hold your body in the lifted position for up a minute and come down to the starting position

Turn your side and do it with your left hand and do 3 sets … Find more

Ayurveda Can Glow Your Skin

Ayurveda Can Glow Your Skin In 10 Ways

Want glowing skin! If yes, then get ready to make your skin glow with home treatment. Use an ayurvedic treatment to treat your skin. There are 10 ayurvedic ways to clean your skin of blemishes and get back the natural glow.

  1. Sandalwood And Almond Powder
Sandalwood And Almond Powder

Sandalwood has antiviral and antiseptic properties that will keep your skin free of blemishes. Also, it leaves behind a bleaching effect. Almond powder will lighten your skin tone in addition to providing essential nutrients.

Preparation:

Mix 4 tsp of sandalwood powder with 2 tsp of almond powder and 3 tsp of coconut oil until you get a smooth paste. Apply the paste on your skin for 20 minutes and rinse well when it is dry. You can apply it twice or thrice a week.

  1. Turmeric And Rice Flour
Turmeric And Rice Flour

Turmeric is a natural antiseptic. It is also an exfoliating agent. Rice flour will whiten your skin and tomato juice will lighten the blemishes on the skin.

Preparation:

Mix turmeric powder and rice flour 2 tsp each in a bowl and add 2 tsp tomato juice in the mixed powder. Make a smooth paste with the ingredients and apply it to your face until it is dry. Apply the paste all over your face including your neck. Rinse the paste with cold water when it is dry. Apply it three or four times a week for better results.

  1. Aloe Vera And Lemon
Aloe Vera And Lemon

Aloe vera is an antioxidant that can prevent your skin from damage by free radicals. Also, it can reduce inflammation and strengthen the skin from within. Lemon will brighten your skin by cleansing it of impurities.

Preparation:

Take 3 tsp of aloe vera gel and mix it well with 1 tsp of lemon juice. Now apply the paste to your face and leave it overnight. Wash your face in the morning and pat dry to get glowing skin. You can also use it during the day but it is better to use it at night. And you can use it every night.

  1. Saffron And Olive Oil
Saffron And Olive Oil

Saffron is good for your skin as it can reduce blemishes, cure acne, lighten the complexion and improve skin texture. And olive oil can prevent the eruption of blackheads and whiteheads.

Preparation:

Soak 2-3 saffron strands in a cup of distilled water until the water turns yellowish golden. Add 2-3 drops of olive oil to the water and mix it well. Take a cotton ball and soak it in the mixed water. Apply the mixture on your face with the cotton ball and leave it for 15 minutes after which you can rinse your face with cold water. You can do it three or four times a week.

  1. Kumkumadi Oil
Kumkumadi Oil

Kumkumadi oil has antibacterial and antioxidant properties that make it good for the skin. Its continuous use can reduce tan in the long run. Also, it will prevent the appearance of blemishes on your skin.

Preparation:

Take 3-5 drops of kumkumadi oil in your palms and rub the … Find more

Remove Your Upper Belly Fat

What Are The Three Things You Need To Remove Your Upper Belly Fat?

It is difficult to burn upper belly fat with dieting and exercises only as you need to adopt a three-pronged strategy of exercising, dieting, and lifestyle changes.

Let’s start your weight loss training for upper belly fat by exercising

  1. Exercises

Jogging and swimming could be your favorite exercises but they would be of little help in controlling the stubborn belly fat. You need to focus on exercises that can help burn your belly fat faster.

a. Surya Namaskar

It is the salutation to the sun and there are 12 different ways of saluting the sun. Since you need to make 12 poses, it will consume a good time from your morning schedule but it works for the entire body. It will strengthen your core, tone the body, and reduce belly fat.

Surya Namaskar

Steps:

• Stand up with your feet close together and spine straight to start the salutations.

• Roll your shoulders to relax and puff your chest for the first salutation that is to hold your hands close to your chest in the namaskar position.

• Stretch your arms backward and try looking at the ceiling with your back bent backward in the shape of a bow.

• Exhale to bend forward and bring your hands down to touch your feet.

• Stretch your right leg backward and bend your left knee while balancing your body with your hands on the floor. Lookup for sun salutation.

• Relax with your legs stretched back and your body resting on your hands. Now press your knees together and bring them to the ground. Push your hips up while resting your chin and chest on the ground.

• Make a cobra pose with your feet and keens touching the ground and your chest and chin are looking at the ceiling. Here your shoulders should be away from your ears.

• Make an inverted V-position by raising your hips above and bringing your head down.

• Stretch your left leg back and bend your right leg. Rest your body on your hands touching the ground and lookup.

• Push your hips backward and bring your hands down to touch your feet.

• Stand up in the first position and feel relaxed.

b. Plank Hold

It works well for upper belly thighs and arms.

Plank Hold

Steps:

• Sit down with your knees bent and feet on the ground to start the exercise.

• Bent forward and take the weight of your body on your forearms. In this position, your elbows will be on the floor and you can join your palms to get strength.

• Stretch your legs back until the body weight comes on the feet. Your knees should be above the ground.

• Align your hips with your shoulders for the force and flex your hips forward. You will need to tighten your glute muscles.

c. Bicycle Crunches

This exercise works for the abdomen, hips, obliques

Bicycle Crunches

Steps:

• Lie down on the mat with your hands placed behind your head.

• Interlock your … Find more

Hair Removal Sprays

13 Bestselling Hair Removal Sprays Of 2021

Every woman dreams of clean and clear skin but it is difficult to achieve perfection without using a hair remover. And when it comes to buying a hair removal cream, you have a lot of choices.

If you are looking for a hair remover then you can try one of the below-mentioned 13 hair removal creams that are both effective and safe.

  1. CidbestHair Growth Inhibition Hair Removal Spray

Want your bikini lines free from unwanted hair in a painless way. If yes, then buy this hair removal spray. It is safe to use and gentle in effect. You won’t feel any discomfort while using it on sensitive areas like underarms and bikini lines.

Made with natural ingredients including magnolia flower and lavender, it will make your skin smooth and soft. It will remove ingrown hair and delay its growth. There will be no peeling or pulling or blackspots to deal with.

  1. Neomen Hair Inhibition Premium Hair Removal Spray

If you are looking for a near-permanent solution for unwanted hair then buy this hair removal spray. It claims effective control over hair growth after 4 weeks of use. It is 100% natural, skin-friendly, and best for removing unwanted facial hair.

This hair removal spray is a skin softener that won’t leave your skin dry and dehydrated. Its infused botanical extracts will rejuvenate your skin with essential nutrients. Also, it is easier to use and has no side effects.

  1. Nair Hair Remover Spray

It is a quick hair remover as it can remove hair within 4 minutes of spray. And it claims to remove even thick and coarse hair from legs and arms. It comes in a convenient bottle that sprays upside down and leaves no residue on body parts.

This hair remover also scores high on nutrition count. It contains the goodness of orange blossom and Moroccan argan oil that will act as a deep moisturizer while removing that unwanted hair. But it isn’t suitable for sensitive skin.

  1. Scobuty Hair Inhibitor Hair Removal Spray

It has a unique formula that not only removes unwanted hair but reduces its regrowth as well. Its organic botanical ingredients can reach the hair follicles from where they can gently remove the hair strands from their shafts. Also, they hydrate the skin after removing hair.

This hair removal spray has aloe vera as its main ingredient and aloe vera is good for the skin. It heals faster and makes skin smooth and buttery. Extended use of this spray could keep your skin free from unwanted hair for a long time. But it isn’t suitable for sensitive skin types.

  1. Aliver Hair Growth Inhibitor Spray

It is a natural formula made with aloe vera as the main ingredient and witch hazel, hyaluronic acid, lavender, and menthol being the other ingredients. The things it packs promise exciting results but it could take up to eight weeks in showing good results.

Its advantage is that it is suitable for all skin types including sensitive skin. Also, its ingredients will … Find more

Look Like You Got A Great Night’s Sleep

11 Ways To Fool Others That You Are Taking Enough Sleep

Everyone needs a good night’s sleep. A healthy person needs eight hours of unobstructed sleep. If you aren’t getting proper sleep, you could become ill. But today people are struggling to get proper rest. It is so because they are busy changing their targets and meeting deadlines.

Lack of sleep will make your eyes tired. The eyes will become puffy and dark circles would come up under the eyes. While there is no alternative to sleep, but you can try some ways to look refresh especially when you have an urgent meeting or presentation.

You should try to get sufficient sleep so that you don’t feel tired. Also, you should know how to look fresh when you are actually tired but have some urgent assignments to complete. You can’t go to public with droopy eyes.

Here’re some ways that can help improve your look. Following these ways will help you look fresh even when you aren’t getting enough sleep.

  1. Refresh Your Eyes

Your eyes will tell that they didn’t get even eight minutes of shutdown throughout the night if they aren’t refreshed. So, what can you do to refresh your eyes? Wash them with cold water in the morning. Or treat them with coffee powder.

Freeze two spoons of coffee powder and place the curved part of the spoons into your eye sockets. Leave them for a few seconds until your eye sockets are chilled. Rehydrate the chill area with an eye brightening cream. It will banish the puffy eyes that you could develop after awakening a full night.

  1. Revive Your Skin

Lack of sleep will make your skin look dull and pale but you can revive your skin by taking an early morning shower. Also, use an exfoliating scrub to brighten up your skin. While you will hate an early bath especially after waking up all night, but it is the fastest way to look fresh.

  1. Moisturize Your Skin

The biggest loss of lack of sleep is water. It will dehydrate your skin to the level where people will start questioning your health. But you can look fresh and healthy even when you aren’t taking enough sleep by moisturizing your skin. It will hydrate the skin and banish creases, fine lines, and wrinkles. Apply a thick and occlusive moisturizer that hydrates as well as locks water in the skin.

4.Get Even

Milk can bring life to the lifeless-looking skin. Take some milk in a bowl and add some ice cubes to it. Dip a soft cotton cloth in the milk and let it soak the mixture. Wring the cloth in the bowl and place it over your face. Leave it for 5 minutes and then rinse.

  1. Curl Your Lashes

Your eyes will look fresh when the lashes are up and this you can do at home with the help of a curler. Take it closer to the lash line, squeeze the outer lashes for 10 seconds, and then curl them up. If you travel a lot, you … Find more

Treating Shingles At Home

6 Ways Of Treating Shingles At Home

Shingles are a skin infection that causes stubborn rashes or blisters on the infected part. It is a viral infection caused by the varicella-zoster virus. It is the same virus that causes chickenpox. When the virus attacks, the skin becomes red and inflamed.

Shingles can be treated with antiviral medicines. Also, you can try home remedies to cure a painful skin infection.

Here’re 6 proven home remedies for curing shingles

  1. Oatmeal Baths

A quick oatmeal bath could be refreshing as oatmeal improves the skin barrier against rashes. It contains anti-inflammatory properties that soothe the skin. Also, it has amazing skin-cleansing properties that can remove dirt and other pollutants from the skin. Taking an oatmeal bath can calm the itchiness and inflammation associated with shingles.

For an oatmeal bath, you need a cup of oatmeal powder that you can get by grinding the oatmeal. Add this powder to a bathtub filled with lukewarm water. Stir the water to mix the oatmeal. Soak in the tub for half an hour after which you can rinse your body with normal water and pat dry your body.

The advantage of an oatmeal bath is that you can take it daily and it won’t take you much time in soaking in the oatmeal water. Also, you can make advance preparation like grinding oatmeal beforehand for quick a bath.

  1. Cold/Hot Compress

The cold compress process is applied to control inflammation and swelling after injury especially sports injury. The same therapy can be applied to reduce the inflammation associated with shingles. Since it soothes inflamed skin, it will work on shingles as well.

The hot compress process is good for treating cold sores and it works well. Similarly, the hot compress can be used to alleviate the uncomfortable symptoms associated with shingles.

It is easier to apply a cold/hot compress on the affected area. You only need to apply the compress for 15 minutes and then pat dry the area. Also, the compress should be either washed or disposed of after it is used.

The advantage of cold/hot compress is that it requires no preparation. Also, you can take the treatment once or twice daily or until the blisters are subsided.

  1. Vitamins

Vitamins D and C are quite effective in treating shingles. Vitamin D has immunomodulatory activities that can alleviate pain and swelling associated with shingles. Vitamin C is also found to be effective against the uncomfortable symptoms associated with shingles. And the good thing is that both the vitamins are available in fruits and vegetables.

If you have shingles, you should consume more food items that contain vitamins D and C. For example, take citrus fruits that are rich in vitamin C. you can add more citrus fruits to your plate. Similarly, you can eat green and leafy vegetables, eggs, and fish to increase your intake of vitamins D and C.

While there should be little need to take vitamin supplements, but you can start taking health supplements to take a sufficient dose of vitamins … Find more

Dozen Creams For Weight Loss

A Dozen Creams For Weight Loss

If you are dieting and exercising for weight loss then consider using a weight loss cream that can help burn weight faster than your diet and exercise schedule. And there are many weight-loss creams that you can try to achieve your weight loss goal.

You can ask whether weight-loss creams work. Yes, these creams work as they contain the ingredients that help in burning fat especially cellulite. Before you choose a cream, you should go through its ingredients to understand its function.

Here’s is a list of a dozen weight-loss creams that are quite popular among health-conscious folks

  1. Maple Holistics Tightening And Slimming Hot Cream

It is a multipurpose cream that will melt cellulite from your abdomen, legs, and arms. Also, it will reduce wrinkles and fine lines. Its nourishing ingredients include aloe vera, meadowfoam, white camper, and a blend of juicy fruits. It can even soothe sore muscles and give a relaxing feel when applied after a workout. But it gives a tingling sensation when used and has an unpleasant smell.

  1. RtopR Mango Slimming Weight Lose Cream

It brings a natural blend of mangoes, ginger, Centella, and emollient herbal extracts that burn fat effectively. Together these ingredients boost metabolism to burn fat faster. The cream penetrates deep inside the skin and breaks the fat molecules. It also widens skin pores to allow the body to expel toxins.

  1. Best Cold Slimming Cream: Brazillian Belle Cold Slim Gel

Its main ingredient is caffeine that is a rich antioxidant and possesses anti-aging properties. It reduces cellulite deposits and firms up the sagging skin. Also, it has green tea, L-carnitine, and methanol that promote collagen and boost elastin production needed for skin tightening. Massaging the cream improves blood circulation and generates heat resulting in the expulsion of toxins and excess water weight.

  1. Mroobest Anti Cellulite Slimming Cream

It contains a fast-absorbing formula that is good for many things including the disappearance of cellulite, stimulation of blood circulation, and improvement of skin elasticity. It has aloe vera extract, grape seed oil, and jojoba oil that deeply relax and rejuvenate the skin. It also reduces stretch marks and soothes sore muscles.

  1. HoneyBull Fit Gel Workout Enhancer

If a workout is your favorite mode of weight loss, then this cream will work the best for you. It will double your workout effects so that you sweat more, burn more calories, and fat during the workout. This workout gel contains coconut that works provides nourishment for the skin. Also, it enters the muscles and tones them. It has a refreshing smell, but it could stain your clothes.

  1. TNT Pro Ignite Advanced Workout Enhancer And Slimming Cream

It is an all-natural fat-burning cream made from coconut oil and jojoba oil. It is a non-staining and colorless cream that can be used before and after workout sessions. It works by targeting sweat glands to increase precipitation that can melt cellulite deposits and burn fat at a faster rate. It opens skin pores, relieves muscular pain, and increases thermogenesis. … Find more