Fitness

Yoga For Irregular Periods

10 Yoga Asanas For Irregular Periods

Irregular periods could be a sign of an underlying medical condition. But it will be too early to make an opinion on the irregularity of your periods before you see a doctor. There are many reasons for your periods becoming irregular & somehow can be cured by yoga.

What Are Irregular Periods?

What Is Irregular Periods?

Typically menstrual periods last four to seven days and occur every 28 days. If your periods come before 21 days or later than 35 days, your periods are irregular. While a slight delay of a couple of days is acceptable, it could be a cause of concern if the irregularity becomes more intense and frequent.

Here’re The Reasons That Cause Irregularity In Periods

  • Periods remain irregular in the first year or two of puberty
  • Periods become irregular during early pregnancy
  • Excessive stress or extreme weight loss or weight gain can cause irregular periods
  • Irregular periods could be the start of menopause
  • Certain medical conditions like thyroid function can cause irregular periods

When To See A Doctor?

There is little to worry about a short delay of a few days in your periods because it is normal. But you shouldn’t ignore irregular periods if they are frequent. You need to discuss irregular periods with your doctor in the following conditions:

  • You are under 45 years of age and your periods suddenly become irregular. It shows that there is an underlying condition affecting your menstrual cycle.
  • You experience periods more often than every 21 days or less often than every 35 days. It could be due to a medical condition.
  • Your periods last more than 7 days. It is abnormal and you must see a doctor to stop blood loss and regularize your periods.
  • If the difference between your periods is 20 days or longer, you should see a doctor to find the reason behind your irregular periods.
  • If you are unable to achieve pregnancy due to irregular periods, you should take the help of a doctor.

Could Irregular Periods Be Controlled?

Yes, irregular periods can be controlled with lifestyle changes, taking healthy food, and medicines, if you are diagnosed with a medical condition that is affecting your menstrual cycle.

Irregularity of the menstrual cycle isn’t always a problem. It could be due to stress and anxiety. Or it could be due to your weight loss exercises. You should first investigate the change that is affecting your menstrual cycle. Also, you can try some home remedies to regularize your menstrual cycle.

What Is The Best Home Remedy For Irregular Periods?

Best Home Remedy For Irregular Periods

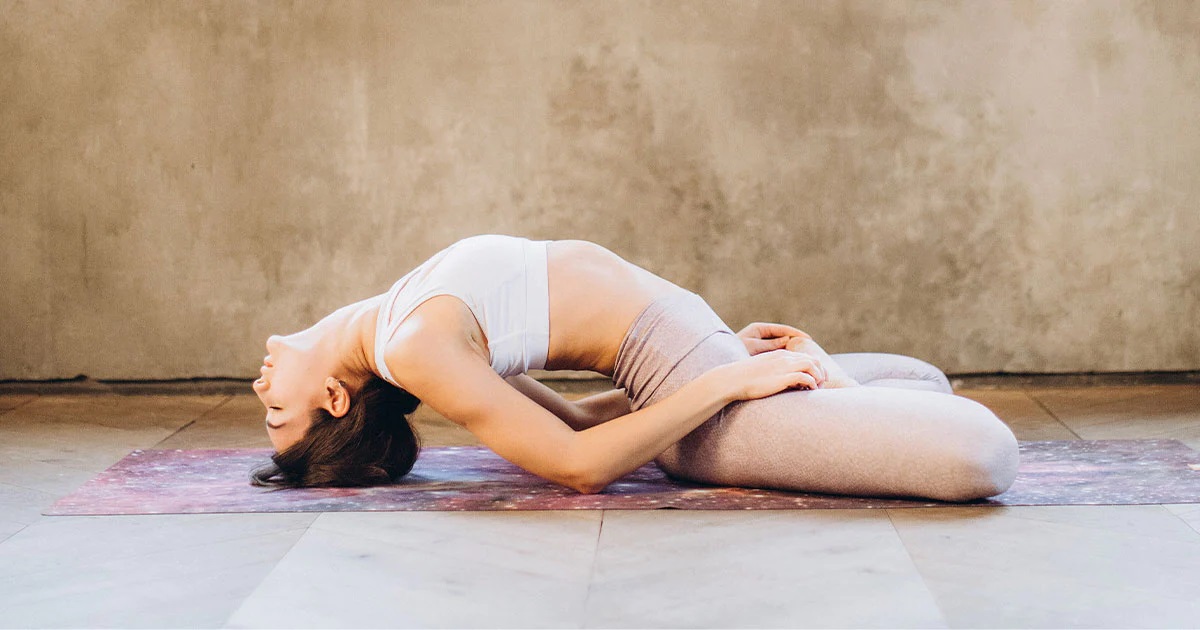
You can try maintaining an ideal weight according to your height and age. Also, you can take a balanced diet. Or you can try yoga. Some asanas can help regularize your menstrual cycle and reduce suffering as well. These asanas can even fix some common ailments like reducing the levels of testosterone and massaging your reproductive organs.

Yoga is quite helpful for women who … Find more

Outer Thighs Exercise

Try This Outer Thigh Workout To Maintain Your Figure

Everyone in this world want a perfect figure and good body posture at last, they’re trying lots of exercise with all virtuousness and hard work out. Outer thigh workout is a great combination as they’re muscle groups that are largely requested when it comes to strengthening and toning.

When you are getting older and your body shape are getting change for the perfect shape you have to train your body with good exercise and good food that help you to gain perfect shape.

“Our bodies move in different directions, not in one direction, so it’s important to mimic that during cross-training, these outer thigh workout areas in a quick and effective way that’s great for all fitness situations.

Tone your shanks, outer thigh workout with these best low impacts, bodyweight exercises.

Squat

Squat Exercise

Improve strength and mobility by getting seriously low in these squats. Squeezing those glutes at the top of the move will give you more bangs for your buck, too.

Lateral Step Out Squat For Outer Thigh Workout

Lateral Step Out Squat For Outer Thigh Workout

We promise you’ll feel this one fire up the hips, glutes, and thighs. However, place a resistance band around your ankles to increase the resistance with each step, if you’re impervious to the burn.

Plank

Plank Exercise

Plank form is everything, if you want to do outer thigh workout then plank is best for you. Do them right and you’ll hit the lower body, while toning up your core and shoulders, too.

Fire Hydrant Is Best Outer Thigh Workout

Fire Hydrant Is Best Outer Thigh Workout

Keeping your hips refocused towards the ground and leg bent to a 90- degree angle, raise your left knee out to the side as high as you can, This mobility is best for warm- ups it helps you to maintain a killer booty shaper as well.

Lying Leg Lift

Lying Leg Lift

Lie flat on your stomach, with your forehead resting on your hands. No, no, it’s not a sleeping time. But it’s your last move in this outer thighs workout dynamic body series. We’re hitting those glutes from all angles, and never missed this dynamic part of your exercise.

Bent Leg Kickback For Outer Thigh Workout

Bent Leg Kickback For Outer Thigh Workout

Begin in table top position on your knees with forearms down. Engage those glutes as you lift your right leg straight back and over to the sky, keep your foot flexible. Lower back down with control and repeat 20 times and switch your sides after every interval.

Mini Band Knee Openor

Mini Band Knee Openor

Place the mini resistance band above your knees, this move can also be done without the resistance band. Lay on your right side, knees bent back, bases together, with your body resting on that right elbow. Keep your bases touching as you lift that top knee over and back. Lower and repeat 20reps.

Legged Bridge Is One Of The Important Outer Thigh Workout

Legged Bridge Is One Of The Important Outer Thigh Workout

Start this outer thigh exercise in a ground position with reverse position on the mat and legs bent at 90 degrees. Place … Find more

Yoga For Back Pain

Pain Relieving Yoga For Back Pain

If, your are also suffering from back pain and your pain is increasing day by day, with increasing minutes, for that pain relief you have to do something with the help of yoga for back pain.

For relief, you can do yoga daily if you’d like, but if you’re doing yoga for back pain, start with just a couple times per week. Also, many suffered people find it useful to throw this back pain from their daily life.

You can start your pain relieving journey with the help of this yoga for back pain and work all day.

Child’s Pose

Child's Pose Yoga

“Child’s pose takes the pressure off your lower back by protracting and aligning the spine, which decompresses it and gives you a nice stretch.

How to

  • Kneel on your mat with your knees hip width and your feet together behind you. Take a deep breath in, and as you exhale laid your torso over your thigh.
  • Try to lengthen your neck and spine by drawing your ribs away from your tailbone and the crown of your head away from your shoulders.
  • Rest your forepart on the ground, with your arms extended out in front of you.
  • Hold it for 1 – 2 minutes.

Cat/Cow Pose Yoga For Back Pain

Cat Pose Yoga For Back Pain

“This is presumably everyone favorite Yoga for back Pain. It allows for a nice flexion and extension of the spine, promotes mobility, and” it also helps to just relieve any pressure in the back side area.” Cat/ cow also help you get familiar with what your neutral spine is not too arched and not too rounded which can help to maintain the posture.

How to

  • Start with all fours and your shoulders over your wrists and hips over knees.
  • Take a slow inhale, and on the exhale, round your spine and drop your head toward the bottom( this is the cat posture yoga).
  • Inhale and lift your head, chest, and tailbone toward the ceiling as you arch your back for cow.
  • Do this every single day for 1 – 3 minutes.

Sphinx Pose

Sphinx Yoga Pose

Sphinx yoga pose creates a nice natural curve of the lower area of the body, It also engages your abs a little, which is helpful for supporting the lower area of your body.

How to

  • Lie down with the help of your stomach, legs together and straight out behind you.
  • Place your elbows under your shoulders and your forearms on the bottom as you lift your chest up off the bottom.
  • Press your hips and thighs into the bottom, and suppose about dragging your spine while keeping your shoulders relaxed.
  • Sit up just enough to feel a nice stretch in your lower area of body. Do not hyperextend, and stop incontinently if you start to feel any discomfort or pain.
  • Hold this position only for 30 – 60 seconds.

Plank Is Universal Yoga For Back Pain

Plank Is Universal Yoga For Back Pain

Although this is not exactly a stretchFind more

Oblique Crunch

10 Exercises That Burn Side Fat Faster

The excess fat on both sides of your waist is called muffin top but it isn’t difficult to remove this stubborn fat if you are ready to spend 20-30 minutes every alternate day on burning the side fat. You need to do some exercises at home to bring your waist back to its original shape.

Exercises For Reducing Side Fat

  1. Starfish
Starfish

A variation for side plank, starfish exercise is considered the best activity to reduce side fat. It works on both sides of the waist and burns the fat faster.

How To:

• Come down in a side plank position while maintaining the balance
• Stack one foot on the other without disturbing the balance and extend both of your arms
• Lift the leg on the top and make it firm
• Try to touch the toes of the raised leg with your raised hand and return to the starting position
• Repeat it from the other side
• Do 15 reps from each side

  1. Side Plank Circles
Side Plank Circles

It is a great exercise for muffin tops, lower belly pooch, and love handles. It will also target your oblique muscles and tone your bum.

How To:

• Come down in a side plank position with one leg on top of the other and the lower knee closer to the floor
• Raise your top leg until it becomes horizontal to the floor
• Also, raise your hand to the ceiling to maintain balance
• Start making big circles with the raised leg
• More the leg 20 circles clockwise and 20 anticlockwise
• Repeat the movement with the other side

  1. Oblique Crunch
Oblique Crunch

The advantage of oblique crunch is that it targets both lower and upper belly fat. Also, it will be helpful in targeting the oblique muscles.

How To:

• Lie down on your back, lift your legs, and bend your knees so your calves become horizontal to the floor
• Slide your palms under your head with your elbows pointing outwards
• Lift your torso and bend your left elbow to touch your right knee
• Simultaneously push your right knee slightly back to your left elbow
• Repeat it with the right elbow and left knee
• Do 10 reps from each elbow

  1. Piked Elbow Twists
Piked Elbow Twists

This exercise was primarily introduced to fight love handles but it is also effective on oblique muscles and side fat.

How To:

• Lie down on a mat with your hands and legs in the opposite direction
• Raise your hands and legs to the ceiling
• Lift your torso until your body’s balance comes on your butt
• You can bend your knees to lower your calves to a horizontal position for convenience
• Now turn to your right, bend your right arm, and touch the floor with your right elbow
• Repeat it with your left elbow
• Do 20 reps from each side

  1. Triangle With Dumbbell
Triangle With Dumbbell

The triangle pose is a great stretching exercise and adding a dumbbell … Find more

Exercises To Burn Your Back Fat Faster

10 Exercises To Burn Your Back Fat Faster

Obesity shouldn’t be taken lightly especially fat at the back. If you have back fat, it is an indication of low carb tolerance, insulin resistance, and high testosterone levels. Also, you are more likely to develop diabetes and PCOS. But it can be controlled by reducing body fat especially back fat.

Here’re 10 Best Exercises To Reduce Back Fat

  1. Bent Over Row
Bent Over Row

Target: Biceps, Lats, Traps, Rhomboids, Rear Delts

How To:

• Stand straight with your feet closed and a dumbbell in each hand
• Bend forward with your spine making a 45-degree angle and hips pushed back
• Pull the dumbbells up to your chest and then release
• Do 2 sets of 10 reps

  1. One Arm Dumbbell Row
One Arm Dumbbell Row

Target: Core, Lats, Biceps, Rhomboids, Shoulder Blades, Erector Spinae, Rotator Cuffs, Lower Traps

How To:

• Get an exercise bench and place your right knee and hand on the bench
• Grab a dumbbell in your left hand to start the exercise
• Strengthen your left hand and pull the dumbbell up to your armpit and then release
• It is one set complete
• Try it with the right hand
• Do 2 sets of 10 reps

  1. Bent Over Rear Delt Raises
Bent Over Rear Delt Raises

Target: Deltoids, Lats, Posterior

How To:

• Stand straight with your feet shoulder-width apart and a dumbbell in each hand
• Bend forward a little without flexing your knees and extend your hands at a 45-degree angle to your back
• Pull the dumbbells up in such a manner that your elbows point towards the ceiling
• Release your hands slowly
• Do 2 sets of 15 reps

  1. Wide Grip Lat Pulldown
Wide Grip Lat Pulldown

Target: Biceps, Lats, Shoulders, Teres Muscles, Serratus Muscles, Trapezius, Infraspinauts, Rhomboids

How To:

• Sit comfortably on a lat pulldown machine with your spine straight, chest out, and knees underneath the pads
• Hold the overhead wide bar attached to the pulley and pull it down
• Lean slightly backward to generate the force needed to pull the wide bar down up to your chest
• Release the bar slowly until your hands extend fully
• Do 3 sets of 10 reps

  1. Underhand Cable Pulldown
Underhand Cable Pulldown

Target: Lower Back, Lats, Biceps, Deltoids

How To:

• Sit comfortably on a lat machine with an overhead wide bar attached to the pulley
• Hold the bar with your hands less than your shoulder width and palms facing your chest
• Lean back a little to pull the pulley down to your chest
• Keep your feet flat on the ground and engage your core to generate the force needed to pull the bar
• Release the bar slowly to come to the starting position
• Do 3 sets of 10 reps

  1. Lying Lat Pullover
Lying Lat Pullover

Target: Core, Lats, Triceps, Shoulders, Biceps

How To:

• Lie down on a mat with your knees flexed and feet flat on the floor
• Grab lightweight dumbbells in each hand and raise your hands over your chest
• Bend your elbows to … Find more

Yoga Exercises For Natural Fuller Breasts

5 Yoga Exercises For Natural Fuller Breasts

Women try many things from using suction cups to surgical implants and oils to ointments to make their breasts large and rounded. But little do they know that these methods give short-term results. Also, the results achieved are often unsatisfactory and uncomfortable.

It is better if you could develop your breasts naturally. It is possible if you do exercises, especially yoga poses. The advantage of yoga is that it is easier to practice at home as it doesn’t require additional accessories. A little training and you are ready to practice yoga poses at home.

How Is Yoga Helpful In Improving Your Breasts?

You know yoga has a solution for everything. It can help in losing weight, building muscles, and increasing height. Similarly, it can help in improving the shape and size of your breasts. There are many yoga poses that can stretch your breasts, strengthen the breast muscles, and improve their roundness.

Naturally grown breasts will maintain their shape, size, rounds, and flexibility for a long time. Also, you can maintain the natural size of your breasts by practicing yoga exercises. And there is no side effect of yoga exercises. These exercises are safe for people of all ages.

5 Yoga Exercises To Get Full Breasts

  1. Gomukhasana (Cow Pose)

Gomukhasana will give your breasts the stretch they need to grow. Also, this stretch will improve the elasticity of your breasts. Your breast muscles will be developed and the flexibility of your torso improved.

How To:

• Sit on a yoga mat with your legs extended and hands on your back
• Slid your left leg under your right buttock and cross the right leg over your left leg
• Be comfortable and maintain balance before taking the next step
• Raise your left hand over your head and flex your left elbow to reach your left fingers to your upper back
• Move your right hand to your back from under your right arm and interlock the fingers of your hands
• Hold the pose for 30 seconds and then try it with the right leg
• Repeat it 4-5 times

  1. Bhujangasana (Cobra Pose)

Stretch your bust area with bhujangasana. This asana will strengthen your breast muscles tone your stomach and firm your buttocks.

How To:

• Lie down on your stomach with your toes pressed on the floor and hands under your arms
• Close your legs with your heels lightly touching each other
• Put your palms flat on the floor so you get the required thrust needed to raise your torso
• Lift your torso off the floor with your legs joined and heels touching each other
• Only upper part will be lifted and the lower part will remain fixed to the ground
• Maintain the pose for 4-5 breaths and then relax
• Repeat it 4-5 times

  1. Dhanurasana (Bow Pose)
Dhanurasana (Bow Pose)

The blood flow to your breast area will increase with dhanurasana. Also, it will strengthen your breasts and shoulders. Also, your thyroid glands will … Find more

Sophie Turner Beauty

Outstanding Sophie

Today everyone wants to know about Sophie Turner lifestyle especially her diet & workout routine.

Sophie Turner as we know her today….

The world knows Sophie Turner as Sansa Stark of the hit television series, Game of Thrones (2011-2019). And she even won the Primetime Emmy Award nomination for the Outstanding Supporting Actress in a Drama Series in 2019. But it was just the beginning of a journey to a successful career in the entertainment industry.

Sophie Turner became popular and a household name after featuring in the Game of Thrones. Even her critics accepted that she was the right model for that role. But fitting into the costume of Sansa Stark wasn’t an easy job for Sophie especially when she’s facing health issues.

Sophie Turner was just 14 when she was selected for the role of a noblewoman in the Game of Thrones. She was asked to live the character of Sansa Stark. At that time, she had no idea how the role would change her life and career. It was a just beginning for her but it turned out to be a successful launch of her acting career.

The drama series Game of Thrones came to an end in 2019 but it provided her a strong footing in the competitive entertainment industry. She got ample opportunities to prove her skills. She got many awards and accolades for her role. But it was never an easy job for Sophie who had a tough time dealing with her terrific health situation.

So, how Sophie Turner transformed her body. While critics could say that it was all due to medicines, therapy, and drill or rigorous physical training sessions, but her fans know that she was at war with her image.

Sophie Turner’s diet and workout plan worked well for her and this reason, people want to know about her lifestyle. But first, let’s have a look at her figure.

Height: 1.75m (5’9”)
Weight: 64 kg
Body Measurement: 34/24/34
Skin Color: Fair
Hair Color: Blonde
Eye Color: Green

Sophie Turner diet

Her trainer, James Farmer, put her on a Paleo-inspired diet that includes only high protein foods like broccoli, carrot, lamp, and pastured eggs. James Farmer also revealed that she used to skip her breakfast almost every day. She started taking a full breakfast on James Farmer’s advice.

Breakfast: The first thing James Farmer did he made sure Sophie Turner had her breakfast and the meal sumptuous as well. She is served a staple combination of cereal and fruit juice. Here Sophie Turner is allowed to choose the fruit.

Lunch: Sophie Turner takes lots of healthy fats and fibrous vegetables in lunch. Since vegetables are easier to turn into a salad, she prefers a fulfilling salad complete with lean proteins like chicken, turkey, and salmon. She also consumes nuts like almonds and cashews.

Dinner: Sophie Turner sticks to her Paleo diet except for the days when she’s at home with her husband Joe Jonas, or … Find more

Dip Exercises For A Strong Back

10 Dip Exercises For A Strong Back, Shoulders, And Triceps

If you are looking for exercises that are challenging but convenient to practice then consider dip exercises that you can easily practice at home, in a health studio, or an open gym. The advantage of dip exercises is that you can increase the level according to your fitness and abilities. While most dip exercises can be performed at home, you will need to access a gym for other exercises.

Here’re 10 Most Popular Dip Exercises

  1. Bench Dips
Bench Dips

Strengthen your triceps and shoulders with bench dips. Do the exercise at home on a bench, chair, or sofa.

How To:

• Stand straight with your back facing a firm bench
• Come down to half sitting position so your hands reach the bench
• Get a firm hold of the bench and place your feet firmly on the floor
• You will be in half sitting position with your hips parallel to the bench
• Now dip your body as low as you can but avoid touching the floor
• Lift your body with the force of your hands

  1. Parallel Bar Dips

If you want broad shoulders, a fully developed chest, and strong triceps then spend some time doing this exercise. It requires a parallel bar.

How To:

• Stand straight between a parallel bar and grab the bar handles
• Shift your body weight to your hands and lift your body off the floor
• Cross your feet to maintain balance
• Lift your body until your hands are fully stretched and then come back
• Dip your body until your elbows are flexed but avoid touching the ground

  1. Straight Bar Dips
Straight Bar Dips

Want to take your bar dips a level up. If yes then try straight bar dips that will give a widened upper back and strong triceps.

How To:

• Access a straight bar that is relatively above your chest
• Hold the bar firmly with both hands
• Lift your body until your hands are fully stretched and come down
• Try smooth landing and avoid touching the ground
• As soon as you dip your body, you should again lift your body

Note: Select a bar that you are comfortable holding. Difficulty in holding the bar could result in a slip-and-fall accident.

  1. Korean Dips
Korean Dips

It is a next-level exercise where the straight bar will be at your back. It is a little bit more challenging but its benefits are also amazing. It builds the lower back, abs, and glutes.

How To:

• Stand straight with a bar behind your back
• Reach your hands to the bar and make a firm grip
• Keep your hands at a distance of shoulder width for comfort and safety
• Raise your body with the force of your hands and come down
• Your hands should be fully stretched when going up
• You can tilt your body a little forward for support and balance

  1. Plyometric Dips

Bring a little variation to your bench dips to improve your triceps muscles. … Find more

Doing Namaste And Its Significance

The Right Way Of Doing Namaste And Its Significance

In India, people greet each other by making a hand gesture called ‘Namaste’. Also, they say ‘Namaste’ according to their languages. For example, people of the Hindi belt of north India and Nepal say Namaste or Namaskar. In Bengal, people greet each other by saying Nomoshkar. Odia people say Namaskar. In Karnataka, it is Namaskara. In Tamil, it is Venakkam and in Malayalam, it is Namaskaram.

What Is Namaste?

It is a Sanskrit word with varied meanings. Its origin can be traced back to ancient times. Yoga also mentions Namaste and highlights its importance in greeting others. Namaste is simply more than saying hello to others. It has deep-rooted spiritual meaning. Here in this blog, we will discuss the true meaning of Namaste and its implications.

What Happens When You Do Namaste?

You join your palms before your chest and bow your head before the person who wants to say Namaste. In Hinduism, people say Namaste to God. They see the divine presence in everyone and bow their heads in salutation to the divine power.

If you spell Namaste, you will find that it means saluting the divine power. Nama means bowing and stay means to you. Together Namaste means recognizing the divine presence in the person before you and bowing your head to salute the divine power.

What Is the History Of Namaste?

Namaste has roots in Indian culture and it is evident from terracotta figurines excavated from the Indus Valley Civilization site which dates back from 3000 B.C. to 2000 B.C. Many of those figurines were standing with their hands folded in the pose of Namaste. It shows that the tradition of saluting each other with Namaste was known to the people of Indus Valley.

Also, the act of Namaste can be related to the Vedic custom as an expression of honor, courtesy, politeness, and hospitality to others. It is a way to convey your feelings and emotions to the person who you want to greet. When you meet someone, your hands automatically move in the form of Namaste to greet that person. It is how you give honor to others and show your feelings.

What Is The Spiritual Meaning Of Namaste?

Spiritual Meaning Of Namaste

Try once to do Namaste before a mirror to feel what it stands for. While doing Namaste, your muscles will be relaxed and you will feel lighter and happier. When you do Namaste to God or seniors, you feel blessed.

When you do Namaste, you recognize the divine presence in living things including humans, animals, and even plants and water. In Hinduism, people stand before Ganga in do Namaste to seek the blessings of Mother Ganga. Doing Namaste is accepting the presence of divine power and respecting every soul that emerges from that power.

In Vedic philosophy, the divine and self are the same. All things living are born from the divine and doing Namaste to others is recognizing the presence of the divine in souls and saluting the divine. It is the most polite … Find more

Home Exercises To Tone Your Flabby Arms

10 Home Exercises To Tone Your Flabby Arms

If you aren’t exercising, you could get flabby arms. The skin around your arms could tend to lose its elasticity due to aging. Hormonal imbalance could also be a reason for arm fat. But you can tone your arm flab with simple exercises you can do at home.

  1. Triceps Dips
Triceps Dips

Triceps dips are a simple exercise that you can do using your sofa set or even a stool. The only precaution you need to take while doing this exercise is to maintain your balance so you don’t slip and fall.

How To:

• Sit down with a bench to your back
• Reach your hands to the bench and hold it firmly
• Extend your legs and shift your body weight to your arms
• Lift your body and bring it down only with the help of your arms
• Do it 10-15 times

  1. Push-Ups
Push-Ups

It is a chest exercise but it works for the triceps as well. And you can do push-ups without requiring any additional accessories. It will strengthen your chest and shoulder muscles as well.

How To:

• Come down on your fours and stretch your legs
• Keep your hands shoulder-width apart and keep your body straight
• Raise your arms to bring your body to a 60-degree angle
• Lower your chest down but avoid touching the floor
• Do it 10-12 times

  1. Tricep Kickbacks
Tricep Kickbacks

You will need two small-size dumbbells for this exercise but you can replace dumbbells with one-liter water bottles. Use the weight you are comfortable with. Or you can exercise without weight.

How To:

• Stand straight with your feet hip-width apart and a dumbbell in each hand
• Flex your knees and bend a little forward to bring your torso parallel to the floor
• Bring your arms under your chest
• Extend your arms back and forth while keeping your arms close to your chest
• Do it 10-15 times

  1. Tricep Extensions
Tricep Extensions

It is a good exercise as it works for the arms, shoulders, and upper back. You will need a dumbbell or one-liter bottle for this exercise.

How To:

• Stand straight with your feet hip-width apart and a dumbbell in your hands
• Raise your hands to take the dumbbell over your head
• The dumbbell should conveniently rest in your palms
• Lower the dumbbell to your back and then take it up
• Do it 10-15 times

  1. Bent Over Row
Bent Over Row

This exercise will work on your arms, shoulders, upper back, and abs muscles. You will need two small-size dumbbells for this exercise.

How To:

• Stand straight with your feet shoulder-width apart and a dumbbell in each hand
• Flex your knees and bend your torso making a 45-degree angle with the floor
• Keep your hands in the extended position
• Push the dumbbells up to your chest and then back to the extended position
• Repeat this exercise 10-15 times

  1. One-Arm Side Push-Up
One-Arm Side Push-Up

It is a great exercise to remove arm flabs. … Find more