Admin

Yoga For Building Focus And Attention

7 Types Of Yoga For Building Focus And Attention

If you have difficulty in developing concentration and focus, you should try yogasana. There are 7 asanas that can help in improving your focus and attention. Also, they will strengthen your muscles and joints.

The advantage of yoga is that it can be practiced without any additional accessories. Also, you can practice these asanas at home. A little training is needed for these asanas. You will feel amazing benefits in your focus and attention by practicing these asanas.

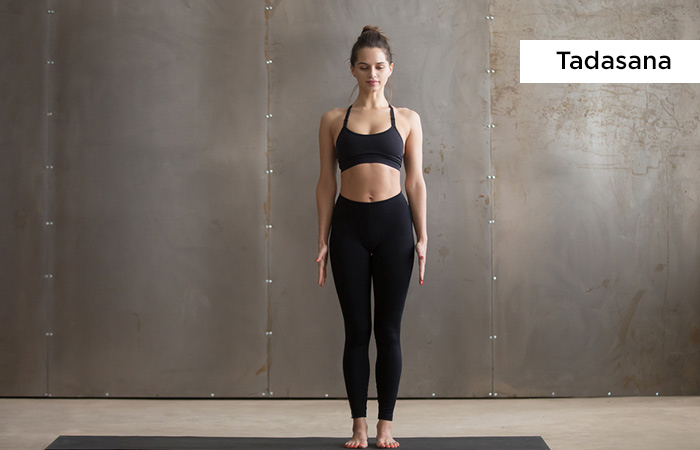
  1. Tadasana (Mountain Pose)
Tadasana

Tadasana improves posture by relaxing muscles and strengthening them over time. It improves flexibility by strengthening the leg and abs muscles. It works on the abdomen to boost the digestive tract function and system in the long run. It develops balance and offers a beginner-friendly yoga pose. Since it is a super accessible asana with multiple benefits, anyone can practice it.

How To:

• Stand straight with your feet hip-width apart and flat on the floor
• Press your heels and toes on the floor
• Lift your knees upward and turn the thighs slightly inward
• Take a deep breath and roll your shoulders up and back
• Release your shoulders and come in Tadasana position
• Let your arms hang naturally with palms facing forward
• Hold this position for as long as you can

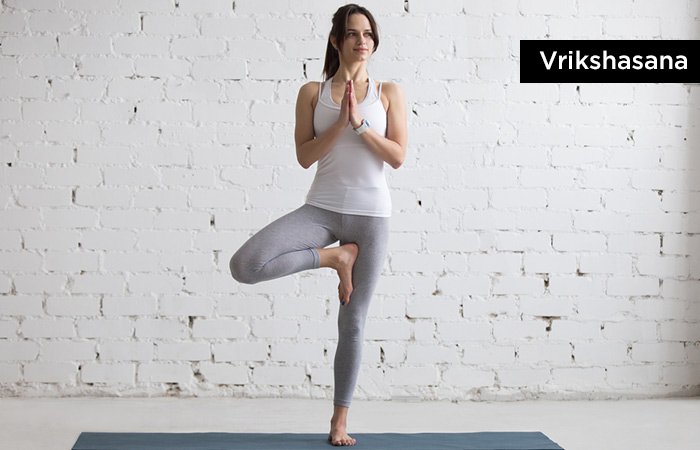
  1. Vrikshasana (Tree Pose)
Vrikshasana

Concentration improves with the time span of the asana. Also, it stretches legs, back, and arms. According to research, it is also helpful in controlling sciatica pain. In addition to these benefits, it also strengthens leg and back muscles.

How To:

• Stand erect with your feet hip-width apart and feet flat on the floor
• Slowly lift your right leg and place your right foot on the root of the left thigh
• Balance your body on the left leg before raising your hands above your head
• Spread your hands and raise them in a circular motion and join your palms over your head
• Look straight and relax your muscles while maintaining the pose
• Release your hands and right leg in the similar motion

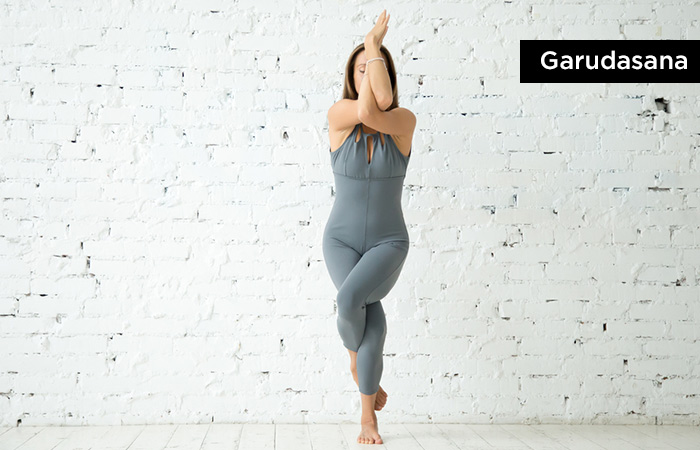
  1. Garudasana (Eagle Pose)
Garudasana

A great strength-building exercise, Garudasana stretches the hip muscles, thighs, lower and upper back, and shoulders. As you stand in a difficult pose with your hands and legs locked together, you learn to maintain balance. This asana loosens legs and hip muscles to give relief from sciatica and rheumatism.

How To:

• Come in Tadasana pose to start
• Carefully lift your right foot and slowly wrap it around your left thigh
• Curl your right foot behind your left calf and lock it there
• Reach your arms in front of your chest and wrap your left hand over the right
• Cross your left elbow over the upper right upper arm
• Cross your forearms, slide your right hand towards yourself, and join the palms
• Raise your elbows to your shoulder height to come in Garudasana pose
• Release the pose in a similar … Find more

Makeup With Your Hair Color

How To Match Your Makeup With Your Hair Color?

When it comes to choosing makeup, your first concern is to hide imperfection and then to improve the skin tone. But little do you know that makeup that doesn’t blend well with hair color looks completely washed out.

Here’re different makeup ideas for 8 types of hair colors. Starting from natural black to shiny magenta color, you need to be careful about your makeup. It should blend well with your hair color.

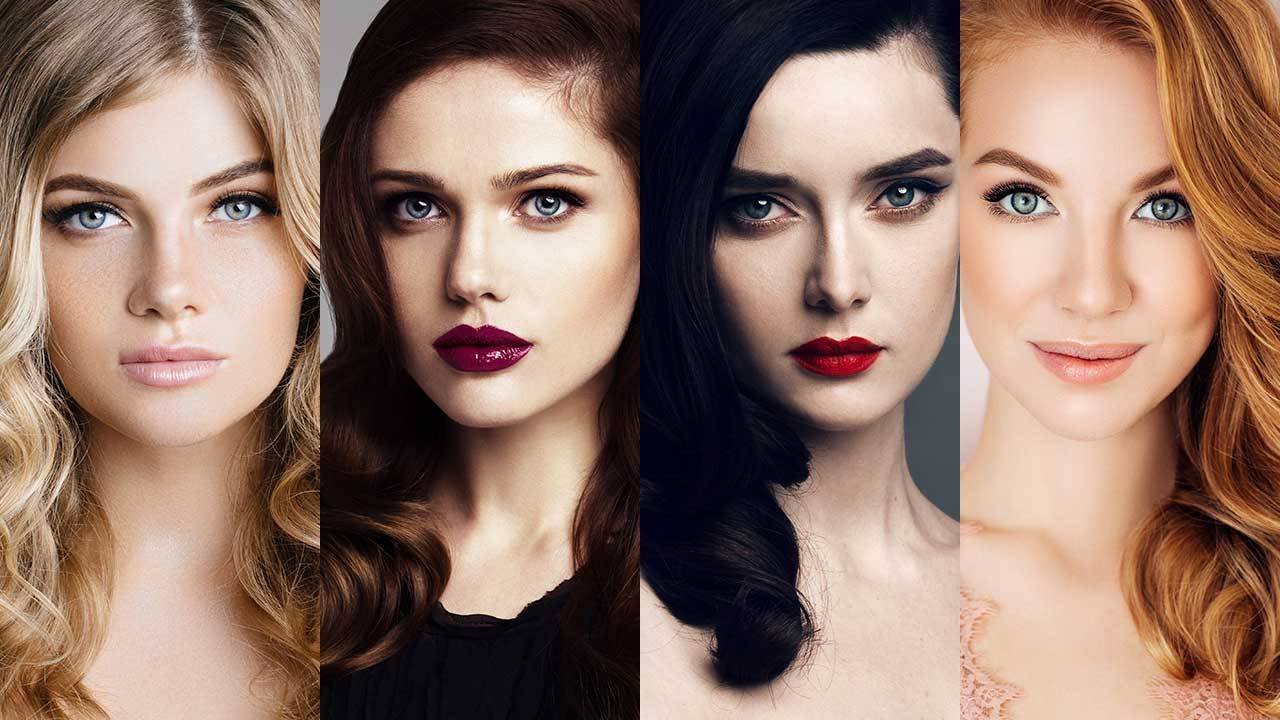
  1. Dark Hair/Black Hair
Dark Hair/Black Hair

Feel blessed, if you have dark black tresses as they look more natural hence more beautiful. With naturally black hair, you can wear almost any shade or go minimal. Simply enhance your features like eyes, cheeks, and lips and keep the rest of the look simple. If your eyes are also dark, it is a double blessing.

Experts suggest wine and blue-based colors to dark-haired beauties. They put more focus on well-defined eye makeup to match their dark-colored hair. And they suggest warmer colors like bronze, corals, purple, and browns for eye makeup. For lips, their suggestion is to wear bolt red or deep plum color. On cheeks, a peach blush would look amazing.

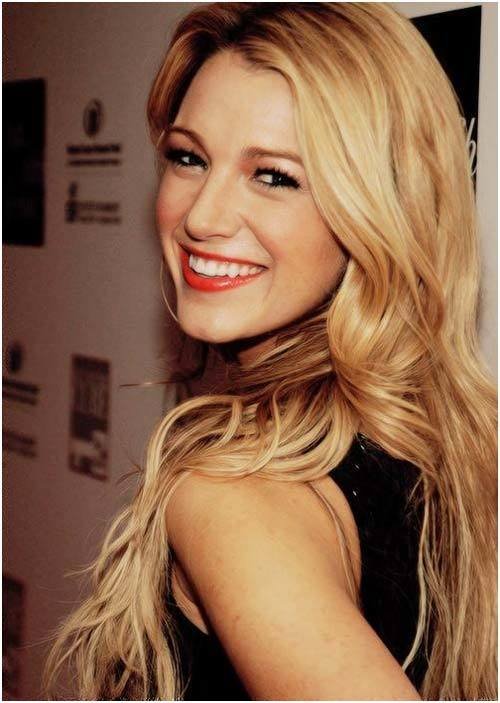
  1. Blonde Hair
Blonde Hair

Blonde hair shines in bright light and for this reason, it attracts attention quickly. But you need to be choosey with your makeup else you will end up with a washed-out look. The first thing to keep in mind is to avoid dark tones as they will create a stark contrast with your beautiful blonde hair.

Start your makeup with a light bronzer on your forehead, cheeks, and chin and a dab of peach to warm the skin tone. Choose ivory pink for eye shadow and pink blush for cheeks. If you want to use an eyeliner then go for greys, blue, and taupe colors. For lips, choose neutral or brown lipstick. Brown mascara will also blend well with your blonde hair.

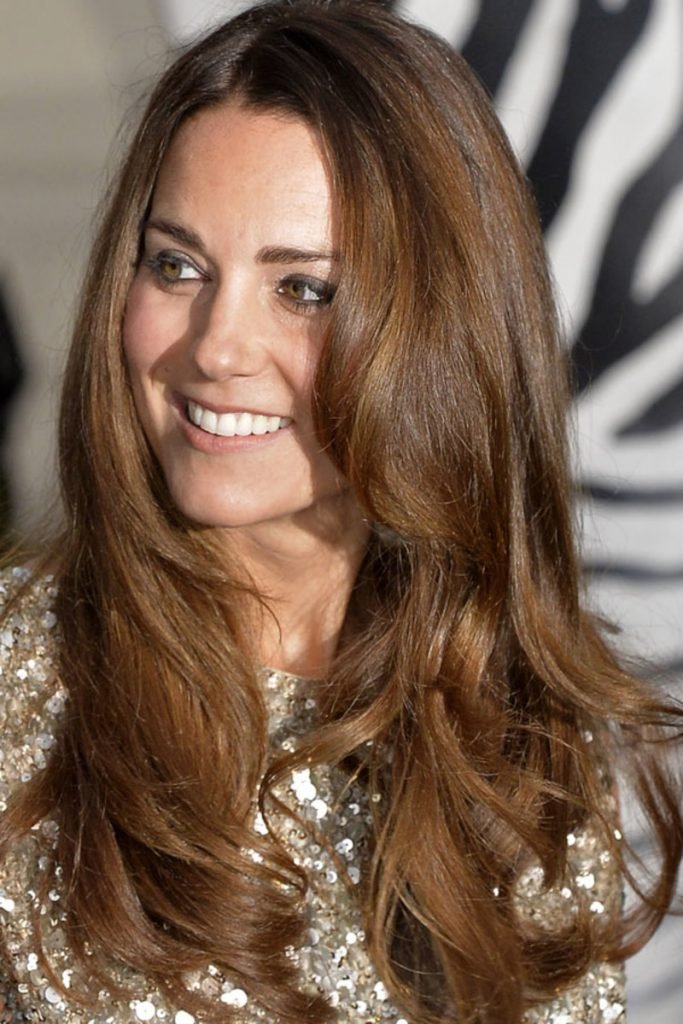
  1. Medium Brown Hair

Medium brown hair allows the luxury of applying shades matching your skin tone or eye color. Also, apply a bronzer with hints of peach or pink tones to add a little radiance to your skin. Your face will glow with the bronzer effect and the skin will be brightened with the peach blush.

Complete your look with brown eyeliner followed by black mascara over your eyes. For lips, you can go for a slightly orange-red shade instead of a regular nude or neutral shade. But you can play with neutrals for eye shadow.

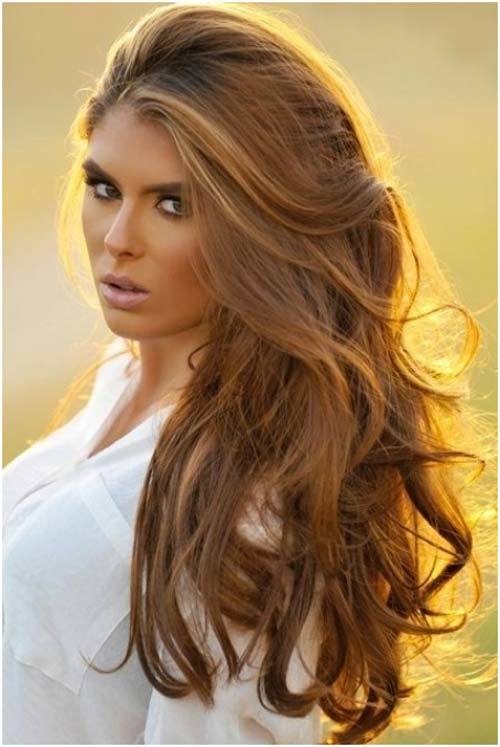
  1. Honey Coloured Hair
Honey Coloured Hair

If you want to go for a natural look then you should brighten your eyes with the help of a light shadow with a hint of gold brushed up to the creases. The next is using eyeliner and here your colors are brown or violet. If you want, you can even go for a dark green shade. These colors will certainly flatter your eyes.

For eyes, you need two coats of mascara from the outer corner of your eyes to the top of the lash line. Also, … Find more

Hairstyles For Long Hair

10 Easy-To-Make Hairstyles For Long Hair

Hairstyle is the most important part of makeup, but most women fail miserably in choosing the right hairstyles. But little do they know that they can style their locks in different haircuts.

Here’re 10 fashionable hairstyles for women with long hair

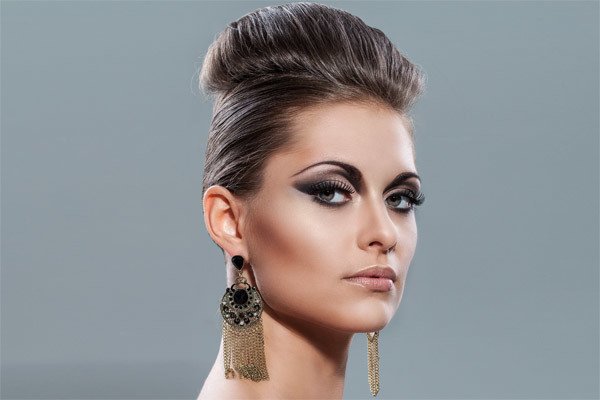
  1. Bouffant
Bouffant

It is a puffy type round hairstyle characterized by high raised hair usually covering the ears or flowing down on the sides. Once a mainstream haircut in the 18th century, it again become popular in the 60s when the First Lady Jacqueline Kennedy was photographed sporting bouffant.

Create a puff of loosely knotted hair by backcombing the hair on the top and upper sides of the head. Then lightly comb the front hair to give your puff a sleek look. And the ends of the outer hair can be curled, flipped, or even cut according to your convenience. Also, use hairspray or hairpins to fix the hairdo.

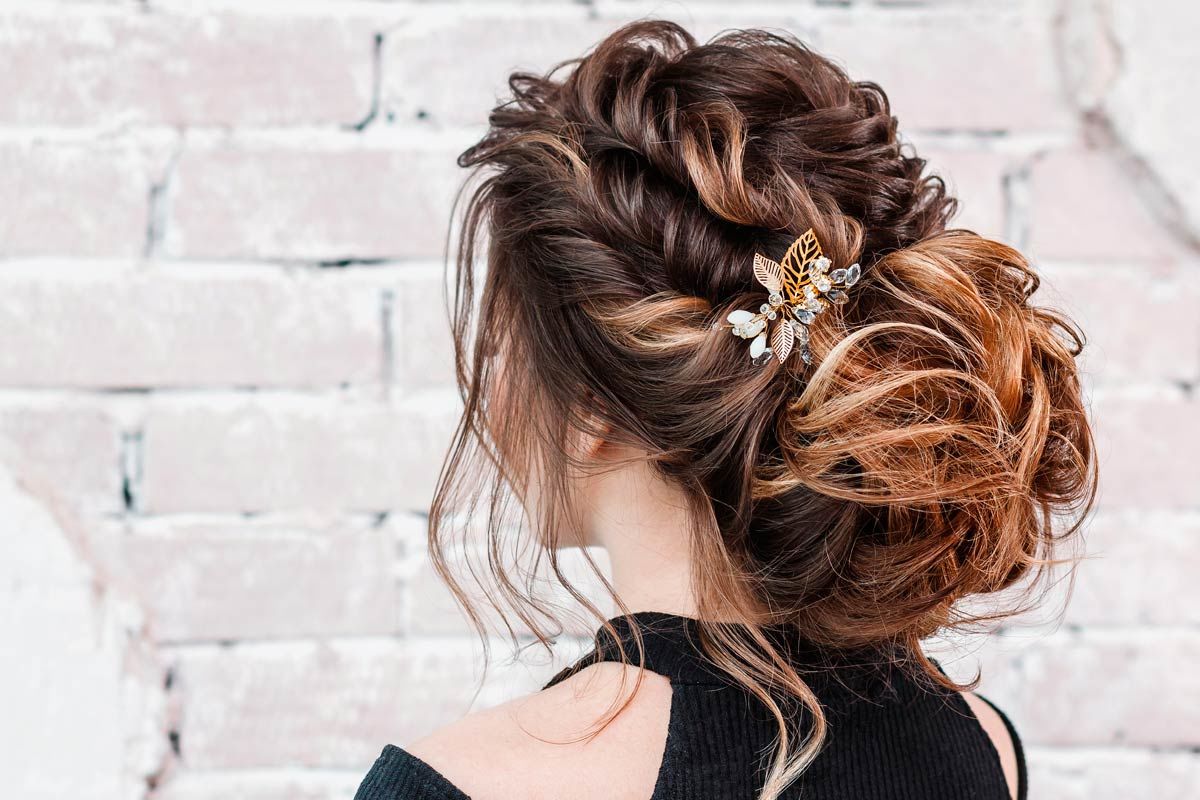
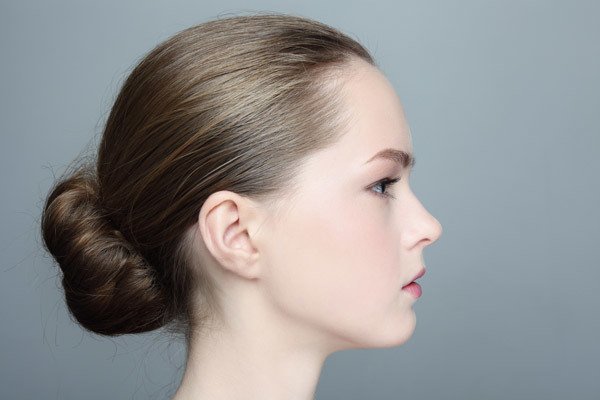
  1. Cinnamon Bun
Cinnamon Bun

A bun is made by pulling hair back from the face and for this reason, it is considered the best hairdo, when you want all the eyes set on your facial features and accessories. But the cinnamon bun is more than a simple bun hairdo as it is matched with gowns, off-shoulders, and backless dresses.

Backcomb your hair till they are straight and then start twisting the entire length to make a bun by rolling the hair. It will be a loose bun but you can fix it with a bun fastener.

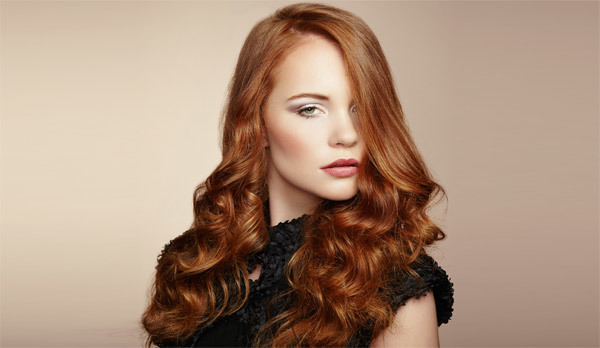
  1. Classic Waves
Classic Waves

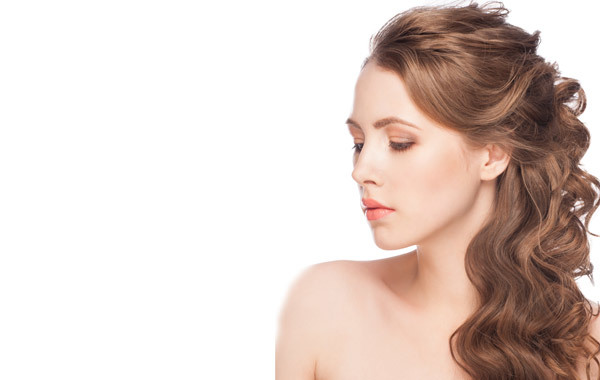
If you are blessed with long and wavy hair, you can keep your locks open just like the model did in the picture. And you will be surprised to know that this haircut will suit all designer outfits including wedding gowns and backless dresses.

First, create waves in your hair using styling equipment and then style your wavy locks from middle to bottom. Part your hair to the right side and leave the top portion of the hair straight and natural. Like the model, you can also pull some waves at the back and allow others to flow on one shoulder.

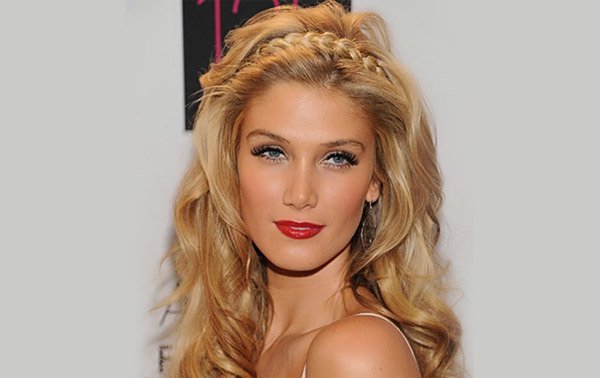
  1. Wavy Braid
Wavy Braid

It is another great wavy hairdo and the good thing is that it doesn’t need to put much effort into making this hairstyle. The basic requirement of this haircut is long and straight hair strands. Another advantage of this wavy braid is its suitability for all types of designer dresses.

Start with straightening your hair and then take some hair strands from above your head and start braiding these strands into a tight braid. Finally, take the braid to the other side and fix it with hairpins. The remaining hair will remain straight and natural.

  1. Half Updo
Half Updo

You won’t find any other hairstyle more convenient and stylish than the half updo haircut. The only thing you need to make half updo is long hair untangled and straight. It is better to make this hairstyle after washing and drying.

Comb your locks in loose waves with divided in the middle. Create a … Find more

Yoga Asanas To Bring Your Hips And Thighs In Good Shape

12 Yoga Asanas To Bring Your Hips And Thighs In Good Shape

If you are dreaming of improved buttocks and fuller thighs then yoga can help. Stretching exercises can strengthen your hips and thigh muscles. Also, they will make your body more flexible. The advantage of yogic exercises is that they require no weight training or additional accessories. Also, the results achieved through yoga asanas are always exciting and long-lasting to reduce fat from thighs.

There are 12 yogic exercises that you can practice at home and get stunning results. Also, you need little training for doing the exercises.

Here’re the yoga asanas for improving your buttocks and thighs

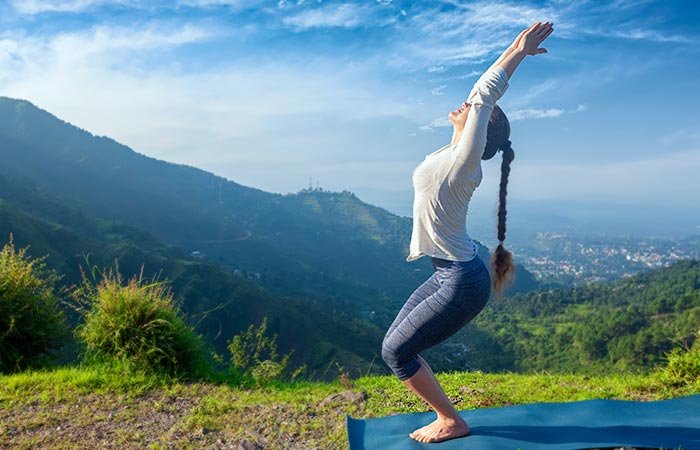
Utkatasana

Utkatasana For Thighs & Hips

It stimulates and strengthens muscles in the legs, hips, and thighs. The pressure exerted on the muscles tones the hips and thighs.

How To:

• Stand straight with your feet hip-width apart and hands by your side
• Bend your knees to come in a half-sitting position to start
• Stretch your arms over your head
• Hold the position for as long as you can

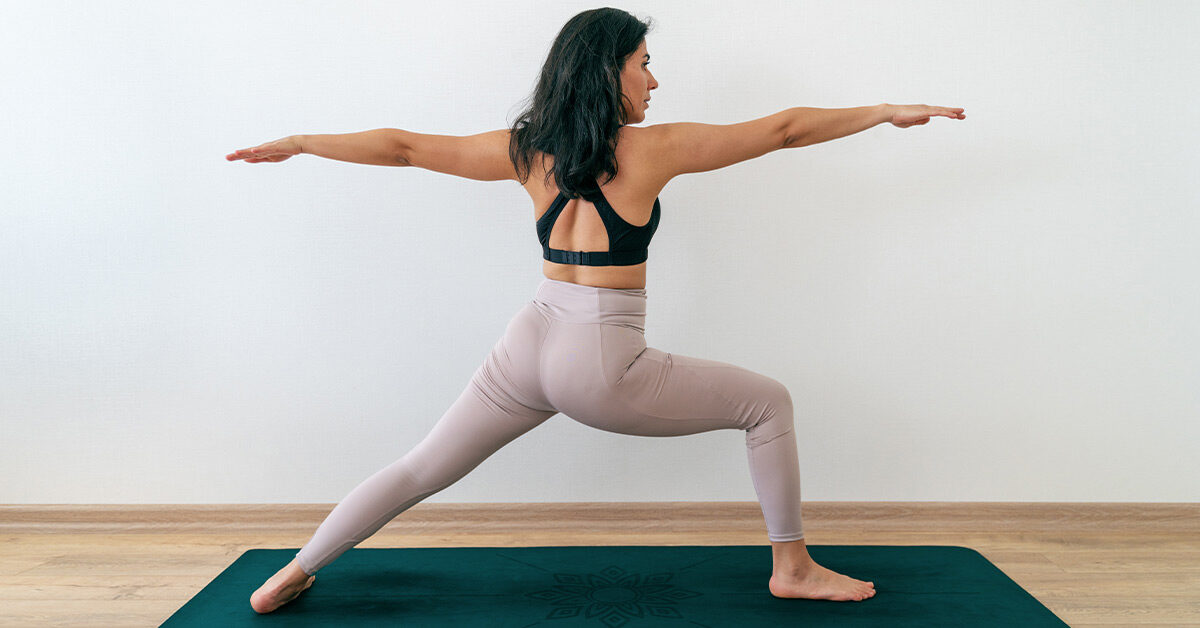
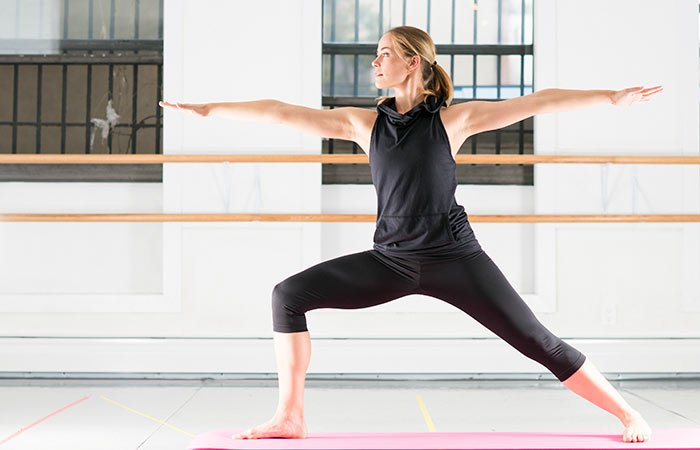
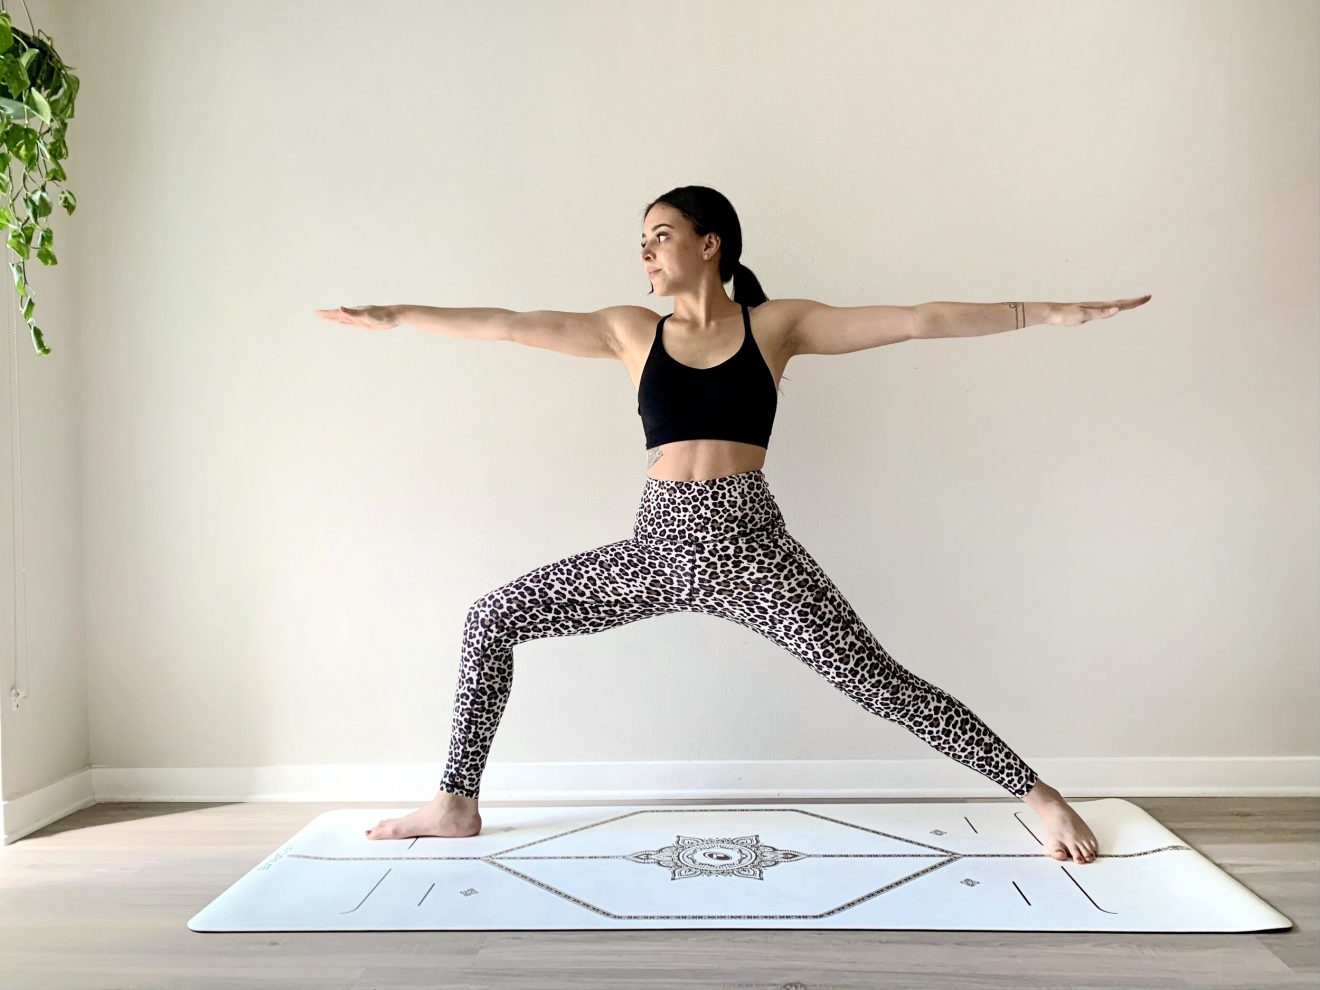
Virabhadrasana II

Virabhadrasana II

The biggest advantage of this exercise is it works both legs at the same time. Also, it strengthens the muscles that are often left by other exercises.

How To:

• Stand straight with your feet wider than your shoulder-length
• Open your arms and turn to your right without bending your knees
• Bend your right knee and stretch your left leg
• Stretch your left leg as much as you can and put pressure on the right knee
• Balance your body with arms and keep your back straight
• Maintain the pose for as long as you can

Natarajasana

Natarajasana Yogic Exercise

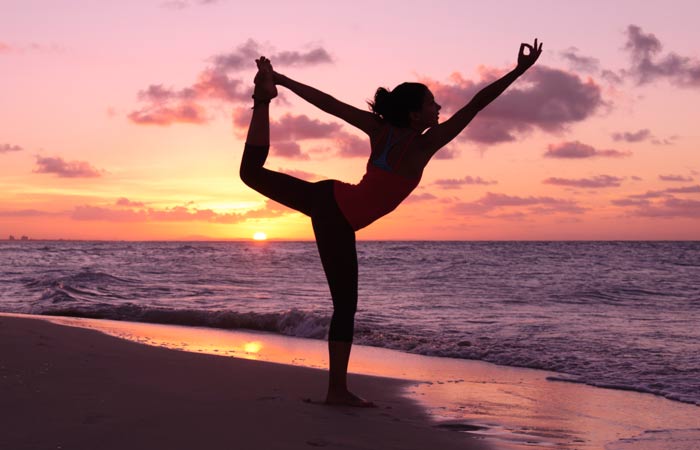
It stimulates hip flexors and stretches the inner and outer thigh muscles. It will tone all your muscles from your pelvis to your feet.

How To:

• Stand straight with your feet hip-width apart and hands by your sides
• Stretch your right leg behind and fold the knee
• Reach your right hand to the toe of the right foot and hold it
• Stretch your left arm forward and make a Gyan Mudra
• Maintain the pose according to your endurance

Ustrasana

Ustrasana Exercise

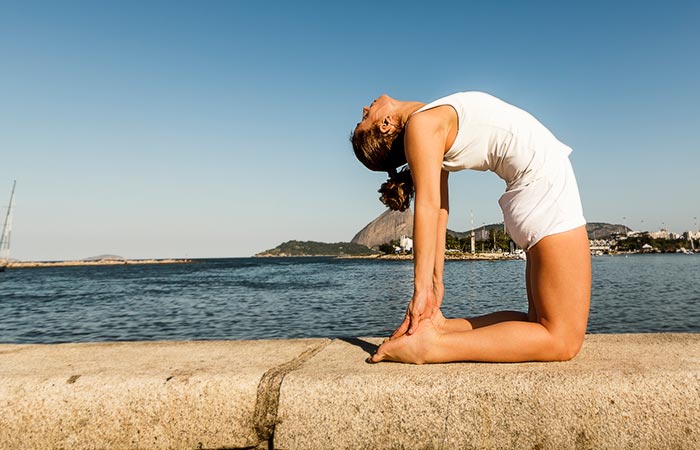
It works on the pectoral muscles the hip flexors. It tones the thighs, especially the front part. You will find your hips and frontal thighs strengthened and toned after exercising.

How To:

• Come down on your knees with your back straight and hands by your sides
• Stretch your chest and reach your hands to your feet at your back
• Try placing your palms over your feet by stretching your chest and neck
• Maintain the position according to your endurance

Upavistha Konasana

Upavistha Konasana

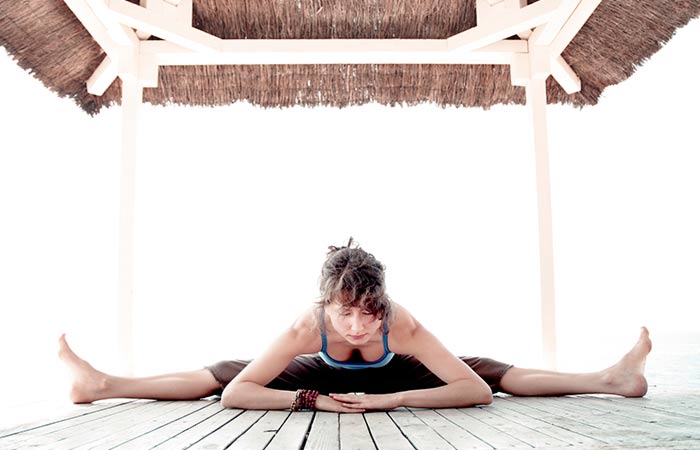
Give the posterior part of your legs a good stretch with this exercise. Also, it works on inner thighs making them beautiful. It builds strength and enhances flexibility as well.

How To:

• Sit with your legs stretched as wide apart as you can
• Now try stretching your upper body to the ground
• Or you can simply … Find more

Strength Building Push-Up Exercises For Women

10 Strength Building Push-Up Exercises For Women

If you want to build your upper body muscles and lift your breasts then try push-ups. Also, push-up exercise is great for strengthening the core, shoulders, and arms. Another advantage of push-ups is there are many variations of this exercise.

Here’re 10 push-up exercises you can practice at home

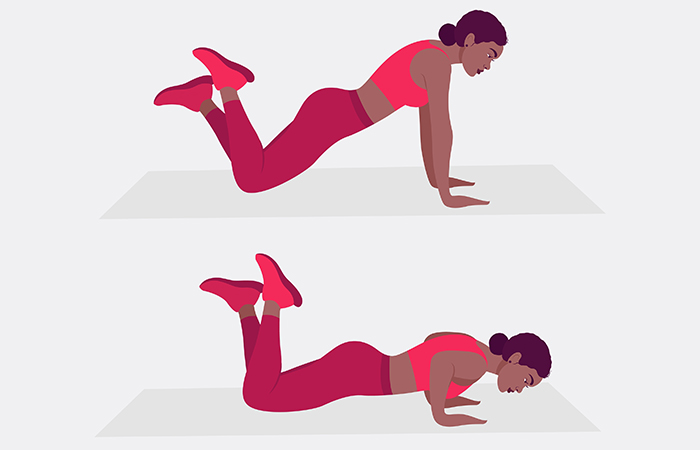
  1. Knee Push-Ups
Knee Push-Ups

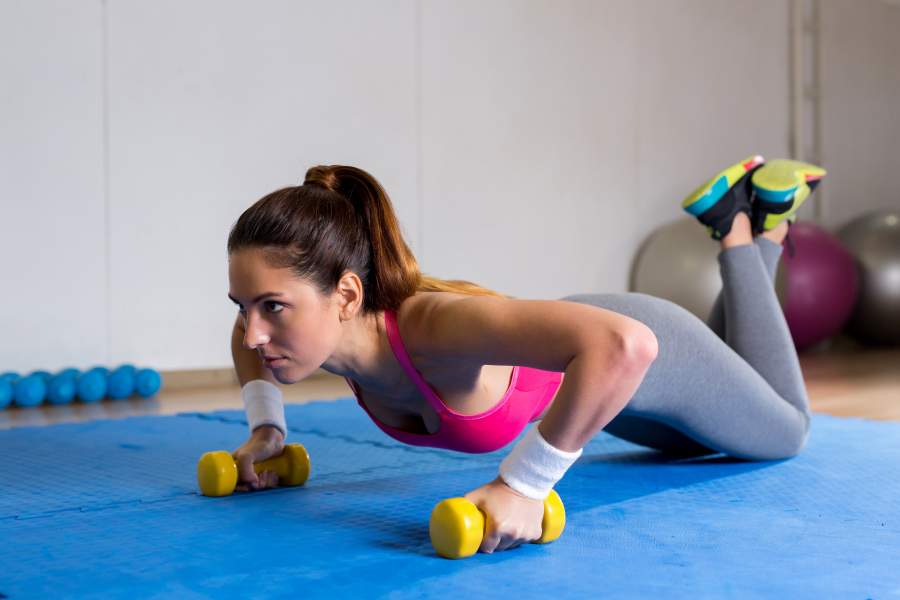
A great exercise for beginners, it strengthens the chest, shoulders, and arms. Also, it is crucial to move to advanced and more challenging exercises.

How To:

• Get down on your fours with your hands a little wider than your shoulder width and ankles locked
• Keep your back and neck in a straight line and also straighten your arms to start
• Lower your chest but avoid touching the floor
• Go slow so you take time in going down and coming up to complete a rep
• Do 3 sets of 5 reps each

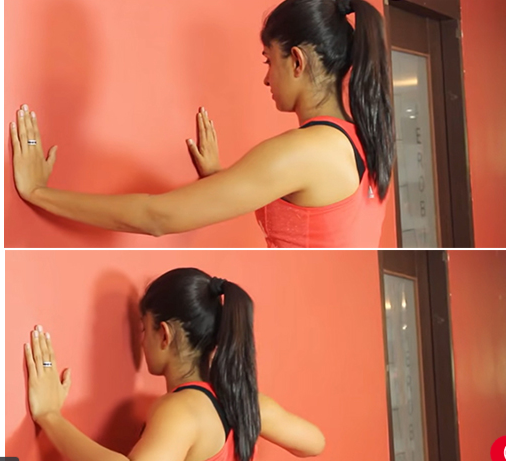
  1. Wall Push-Ups
Wall Push-Ups

It is a good exercise if you want to strengthen your chest muscles. It will work on your chest and enhance your breasts. Also, it will prepare you for regular push-ups.

How To:

• Stand at an arm’s length before a wall
• Reach your hands to the wall and place your palms on the wall
• Stretch your legs and back to bring your body in a straight line
• Start by pushing your chest towards the wall and stop before it touches the wall
• Wait for a while and come back to the original position
• Do 3 sets of 5 reps each

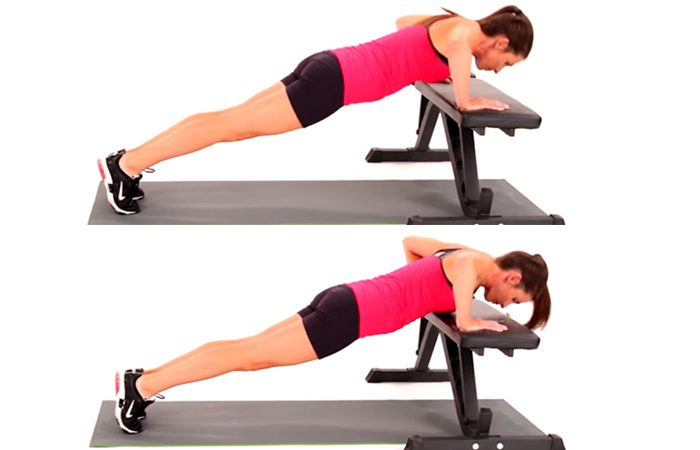
  1. Incline Push-Ups
Incline Push-Ups

It is slightly challenging but it can give excellent results. It can tone and strengthen your chest, shoulders, and arms. Also, it will build the endurance of your upper body muscles.

How To:

• Lay inclined on a bench by placing your hands firmly on the bench
• Your hands should be a little wider than your shoulder-width and your body in a straight line
• Straighten your legs and arms and engage your back to start
• Push your chest to the bench but stop before touching the bench
• Wait for a while and come back to complete a rep
• Do sets of 5 reps each

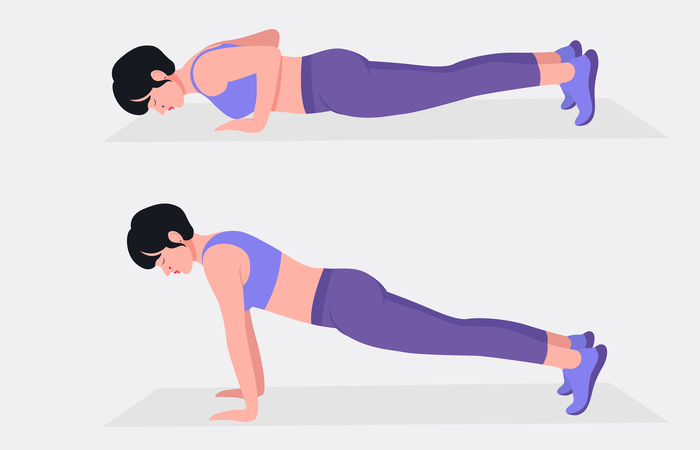
  1. Regular Push-Ups
Regular Push-Ups

Also called basic puh-ups, it is a good exercise as it works for the entire body. Here you will engage all the body from your neck to toe.

How To:

• Come down on your fours with your hands slightly wider than your shoulders
• Stretch your legs as much as you can and bring your body in a straight line
• Take a deep breath and lower your chest but avoid touching the floor
• Wait for a while and come up to complete a rep
• Do 3 sets of 5 reps each

  1. Decline Push-Ups
Decline Push-Ups

Regular push-up exercise becomes more challenging in decline push-ups. But it works well for upper body muscles.

How To:

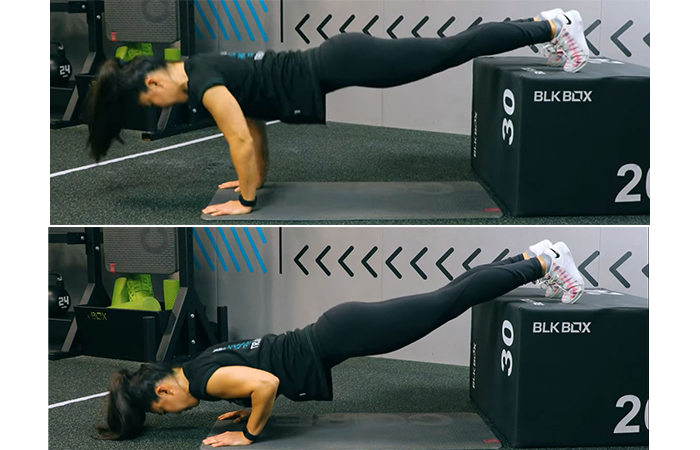
• Come down on your fours with a bench, box, or sofa towards your back… Find more

Best Fitness Wrist Watches For Kids

8 Best Fitness Wrist Watches For Kids

If your child is obese, leads a lazy life, or gives excuses for not enjoying outdoor activities, then you should buy a fitness tracker wristband for your kid. A fitness tracker will help your kid take interest in outdoor activities. Also, you can check the fitness activity of your kid on your mobile.

Here’re 8 best fitness tracker bands for your kid

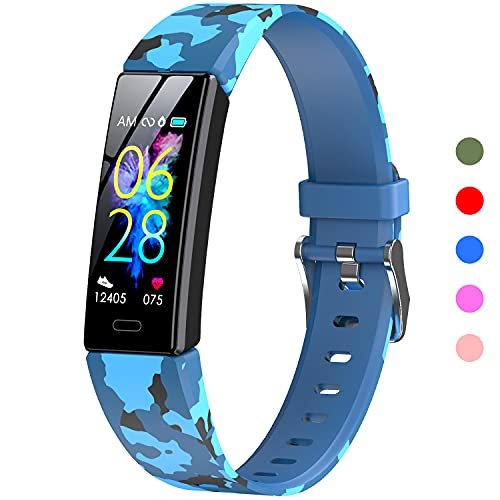
  1. K-berho Fitness Tracker (Amazon)
K-berho Fitness Tracker

It is a multifunctional fitness tracker that can do more than simply monitor your activities. For example, it supports 11 sports including swimming, walking, running, cycling, treadmill, and football. Also, it will remind you when to be active and when to take a rest. This smart fitness band will remind you of your medicines and its stopwatch will help count every step taken towards a healthy life.

Also, it provides amazing entertainment features like remote camera control with which you can click stunning pictures with your phone. It will monitor your sleep and wake you up without disturbing others. You can connect it to your phone so you don’t miss a single call or message.

Pros:

• Water-resistance
• Quick charging

Cons:

• None

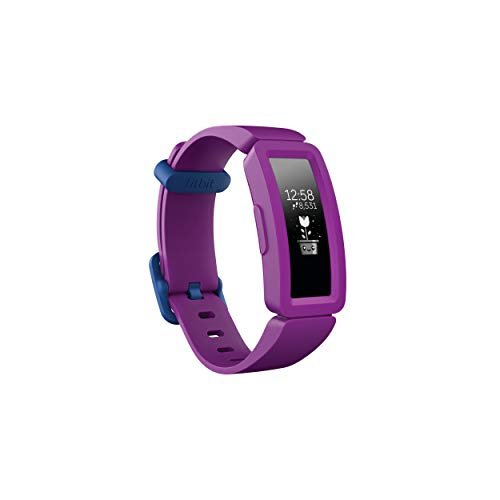
  1. Fitbit Ace 2 Activity Tracker (Amazon/Walmart)
Fitbit Ace 2 Activity Tracker

Track all-day activities to know how they add to a healthier and more active life. Also, it will tell whether you are getting enough rest which is also necessary for a healthy body and mind. A great feature of this health tracker is virtual badges and fun on-screen celebrations that kids get when they achieve their fitness goals.

In addition to making kids active, this activity tracker also encourages them to enjoy friendly challenges in step competitions. Also, it allows sending cheer-up messages to boost the morale of the participants. Since it is made waterproof and spill-resistant, kids can keep it wearing even while washing their hands or playing water games.

Pros:

• Good battery life
• Connects with friends

Cons:

• The screen could hang

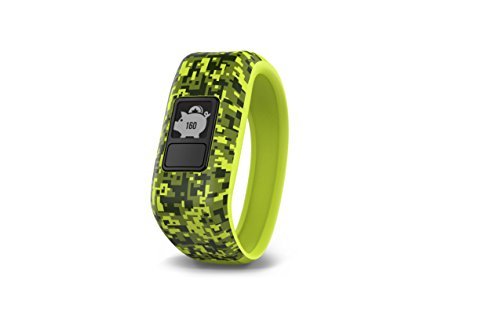
  1. Garmin Vívofit Jr Kids Fitness Tracker (Amazon/Walmart)
Garmin Vívofit Jr Kids Fitness Tracker

This fitness tracker comes with an amazing battery life that is 1 year without charging. The second good thing about this tracker is its design that is made one-size-fits-all. It can be stretched according to the wrist size. As it isn’t enough, the manufacturer gives more with the tracker. It carries a mobile app for parents to keep track of the activities of their kids.

For example, parents can assign jobs to their kids, the children can see the assigned activities on their fitness tracker and obey the orders. It is a useful feature for kids that need reminders for washing hands before meals, brushing their teeth, and taking proper rest. And kids that complete their jobs on time earn virtual coins.

Pros:

• 1-year battery life
• Parenting application

Cons:

• The app has compatibility issues

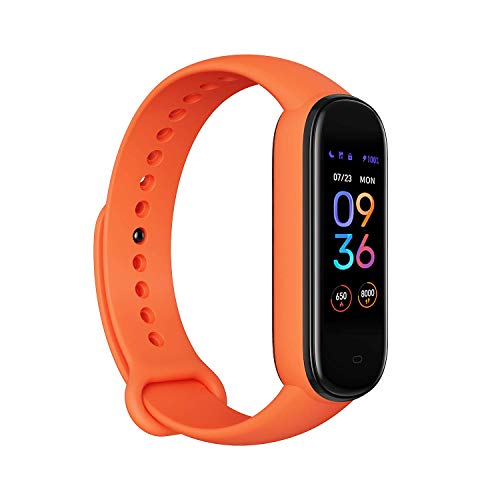
  1. Amazfit Fitness Tracker (Amazon)
Amazfit Fitness Tracker

Things you can do with this fitness tracker are set alarms and timers, control smart devices, ask questions to Alexa, and get translations done by Alexa. Its 15-day battery … Find more

Dumbbell Exercises For Figure Conscious Women

15 Dumbbell Exercises For Figure Conscious Women

Dumbbell exercises are good for the entire body and the good thing is that you can practice these exercises with lightweight dumbbells. Here’re the exercises that can improve your biceps, shoulders, abs, glutes, and thighs.

Here’re 15 dumbbell exercises for beginners

  1. Front Raise
Front Raise

• Stand straight with your feet shoulder-width apart and hands touching the front of your thighs
• Hold a 2-pound dumbbell in each hand
• Roll your shoulders and engage your core to start
• Slowly lift your hands to your shoulder level and then bring back
• It is one rep complete
• Do 3 sets of 8-12 reps

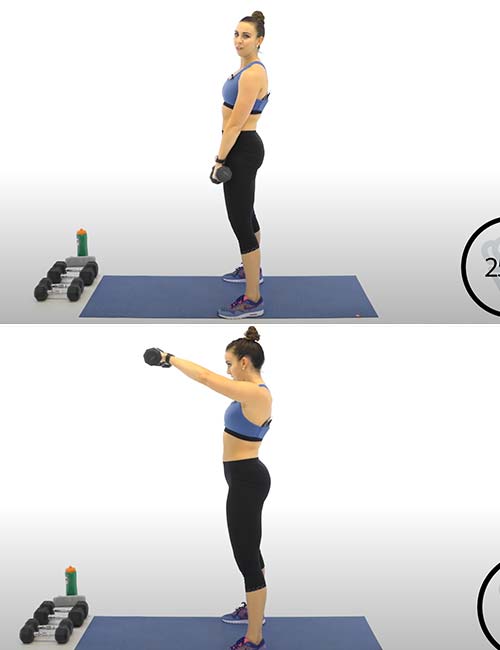
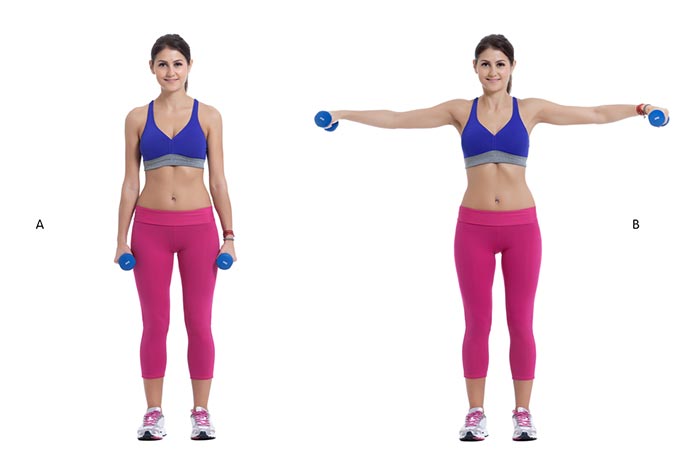
  1. Lateral Raise
Lateral Raise

• Stand straight with your feet shoulder-width apart and hands on the sides
• Hold a 2-pound dumbbell in each hand
• Roll your shoulders and engage your core
• Raise your hands laterally to your shoulder level and bring back
• It is one rep complete
• Do 3 sets of 8-12 reps

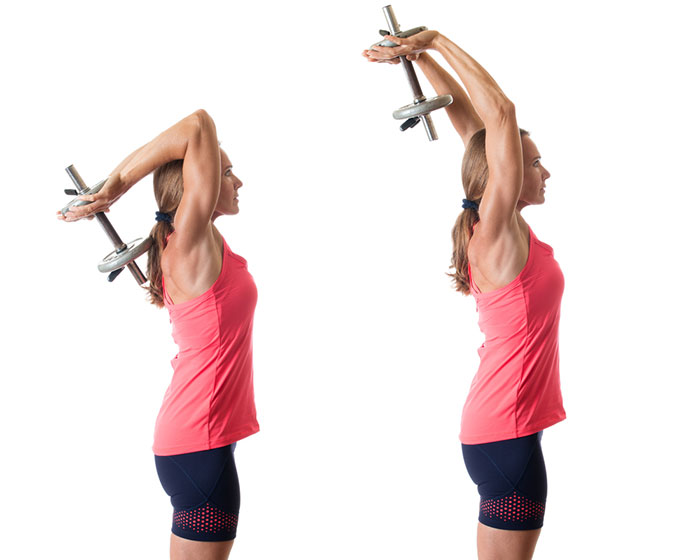
  1. Tricep Extension
Tricep Extension

• Get down on your knees with your back straight and hands raised above the head
• Hold a 5 to 10-pound dumbbell in your hands
• The dumbbell should hang behind your head
• Slowly lower the dumbbell to your shoulder level and they back to the starting position
• It is one rep complete
• Do 3 sets of 8-12 reps

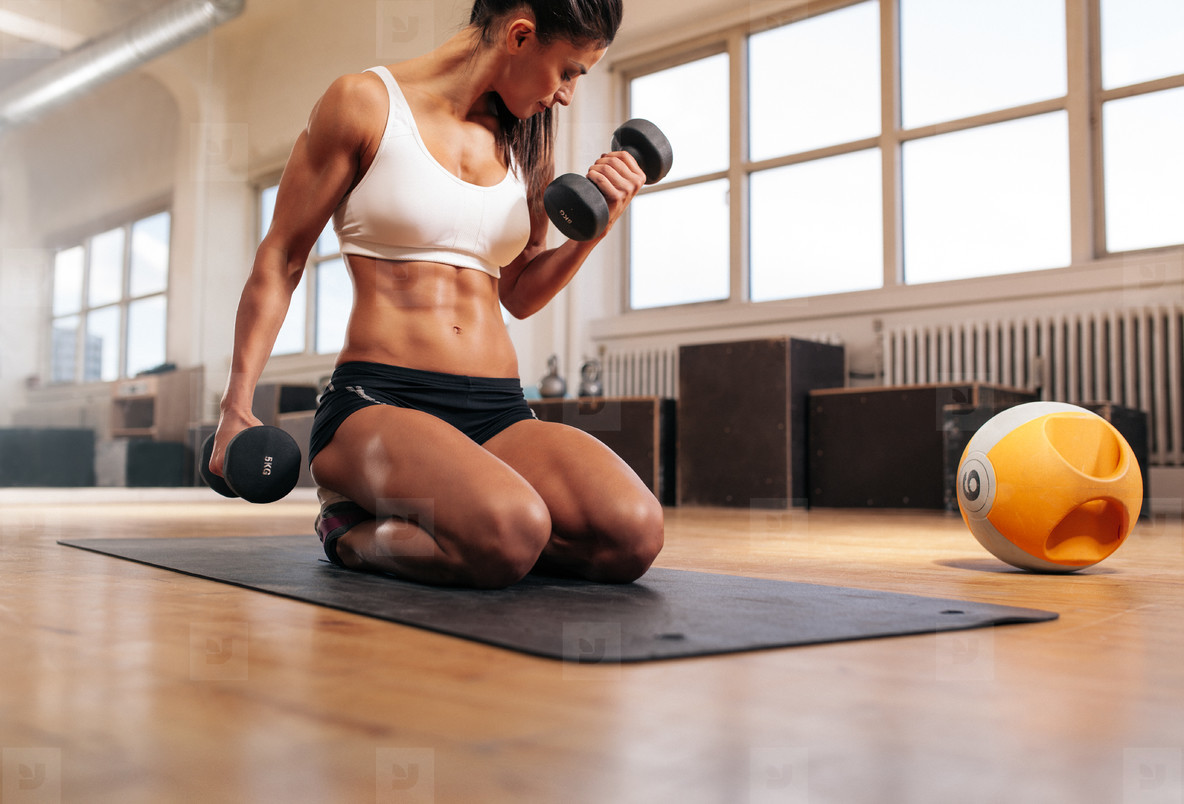
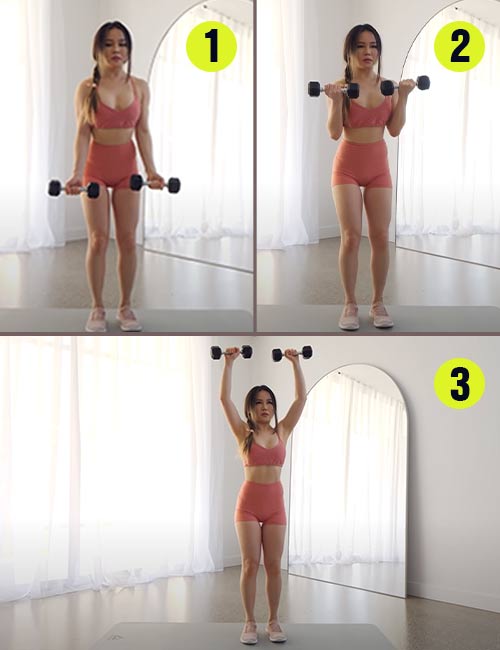
  1. Bicep Curl To Press
Bicep Curl To Press

• Stand straight with your legs shoulder-width apart, hands resting on thighs, and palms facing outwards
• Hold a 2-pound dumbbell in each hand
• First, bring the dumbbells to your shoulder level by bending your forearms
• Second, rotate your wrists inwards and raise the dumbbells over your head by extending your hands
• Come back to the original position step by step
• It is one rep complete
• Do 3 sets of 8-12 reps

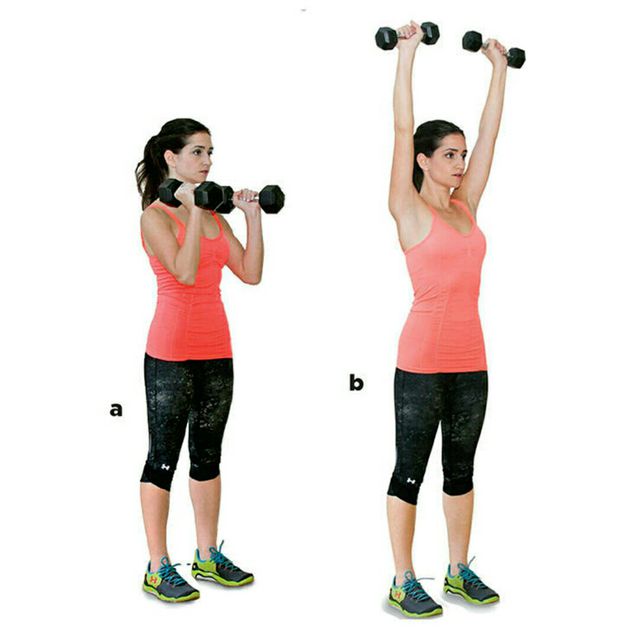
  1. Hammer Curl Press
Hammer Curl Press

• Stand straight with your feet shoulder-width apart and hands by your sides
• Hold a 2-pound dumbbell in each hand
• Roll your shoulders and engage your core to start
• Lift the dumbbells to your shoulder level and take a pause
• Raise the dumbbells over your head
• Again take a pause before coming down
• Come down to the starting position in steps
• It is one rep complete
• Do 3 sets of 8-12 reps

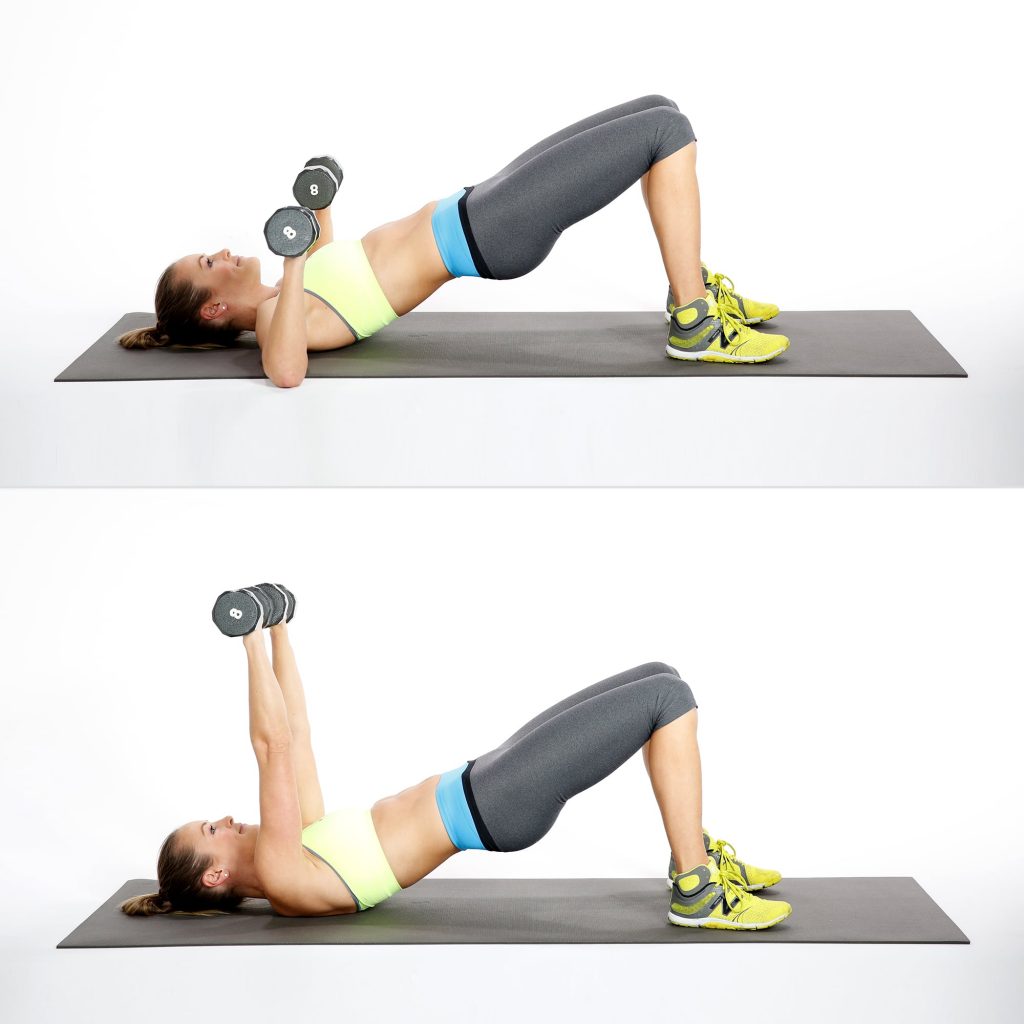
  1. Glute Bridge Chest Press
Glute Bridge Chest Press

• Lie down on a mat with your knees bent and feet flat on the floor
• Rest your upper arms on the floor but keep your forearms off the floor
• The position of your forearms should be perpendicular to the upper arms
• Lift your butts so your abs and thighs come in a straight line
• Take a 2-pound dumbbell in each hand
• Press the dumbbells above your chest, wait for a while and come back
• It is one rep complete
• Do 3 sets of 8-12 reps

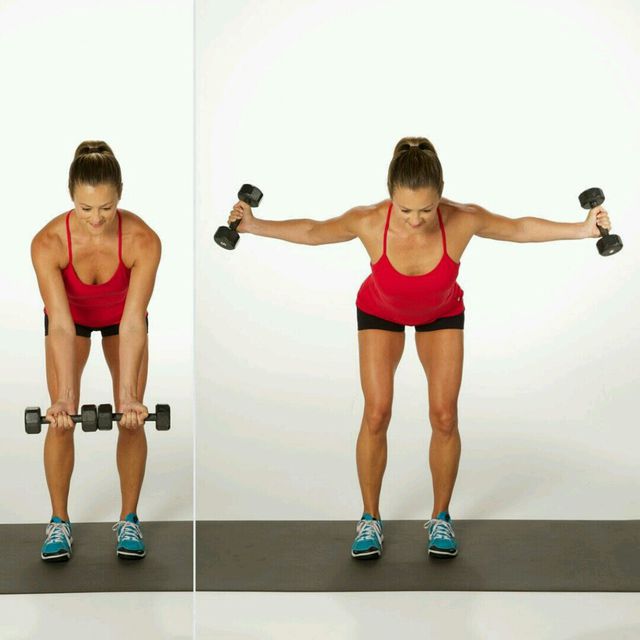
  1. Bent Over Flys
Bent Over Flys

• Stand straight with your feet closed and hands by your … Find more
Benefits Of Swimming Exercises

10 Benefits Of 6 Swimming Exercises

Swimming is a complete exercise as it works for both body and mind. Also, it is good for people of all ages. It can even help children with cerebral palsy.

Cerebral palsy is a disability that affects about 4 kids in 1000 newborns. Children with CP have difficulty moving their limbs. Swimming can help them improve their motor functions in the long run.

Here’re 10 health benefits of swimming

benefits of swimming
  1. It helps in weight loss as you can burn more calories with swimming exercises. Also, it will make burning calories a breeze for you.
  2. It builds bone strength and provides long-term relief from common joint problems like arthritis. It is more helpful for aging people that are susceptible to bone loss.
  3. It is a blessing for people living sedentary life as they are in the high-risk zone of getting heart attacks. But they can improve their cardiovascular health with swimming.
  4. It improves flexibility in bones and joints. You will feel more energetic after every swimming session.
  5. It improves body coordination as it involves the movement of hands, legs, chest, and back muscles to propel the body forward.
  6. It increases neurogenesis that reduces the risk of brain cell death that could lead to temporal lobe epilepsy. A study on laboratory rats proved that swimming works on the brain.
  7. It improves asthmatic conditions. Swimming can reduce the occurrence and severity of asthmatic attacks among asthmatic people. Also, it can prevent the development of asthma in healthy people.
  8. It improves sleep quality. Swimming is a complete exercise for the entire body. It makes all the muscles and brain cells work. It will make you feel exhausted so you can sleep better.
  9. It supports mental health by making the brain cells work. Your intelligence level will increase after starting swimming.
  10. It slows down the aging process. Since it works for the entire body, you can expect good results on your overall health that will make you healthier in the long run.

Swimming is a great exercise and you will be surprised to know that you can choose an exercise that you are comfortable with. Swimming can largely be categorized into six exercises according to position and hand movements.

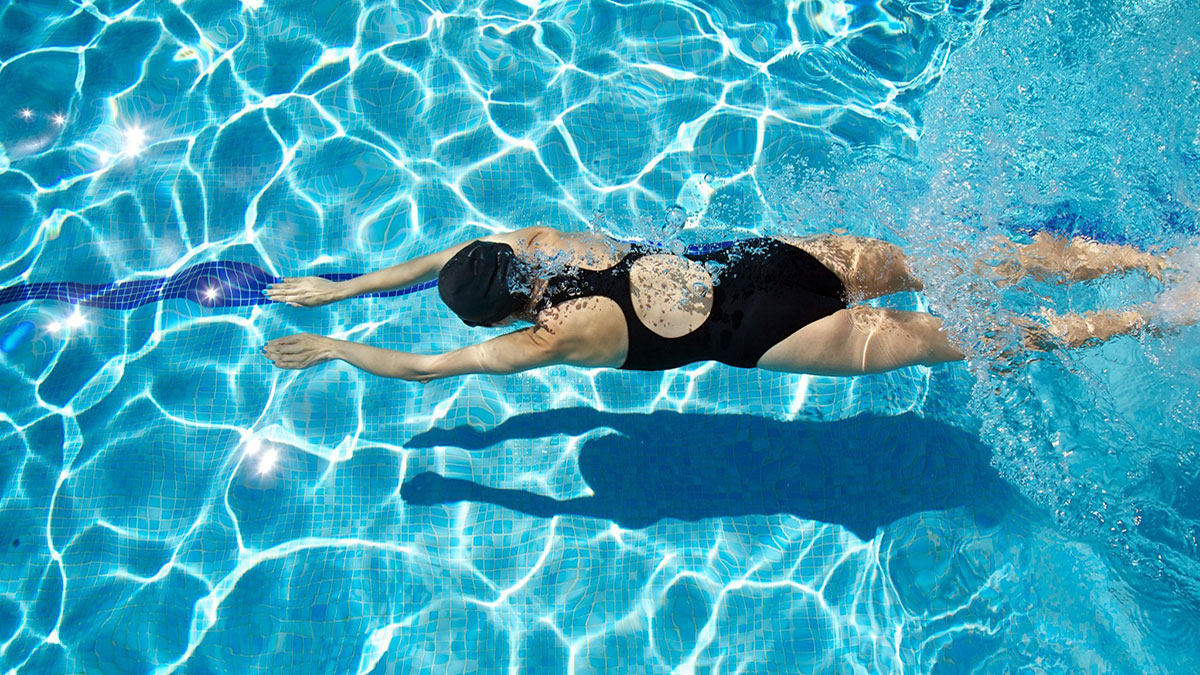
  1. Freestyle
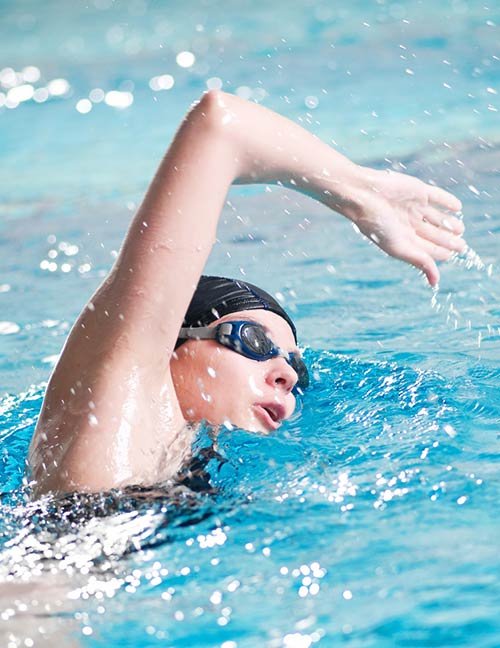
Freestyle

Beginners should start with freestyle swimming as it provides immense flexibility to move your hands and feet to kick the water.

How To:

• Jump in the pool with your face down and hands extended above your head
• Take your right hand in the water, push the water back, and bring it to the starting position
• Now push the water back with the left hand
• Be quick in pushing water back with your hands one-by-one to move forward

  1. Backstroke
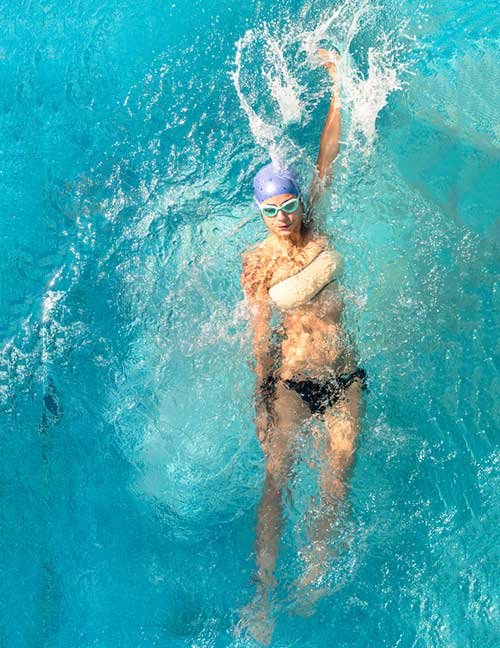
Backstroke

Here you float on your back just like you lie on a bed and use your hand movements to move forward.

How To:

• Float in the pool on your back with your hands
• Lift your right hand out of the water and move in a clockwise circle into the water
• … Find more
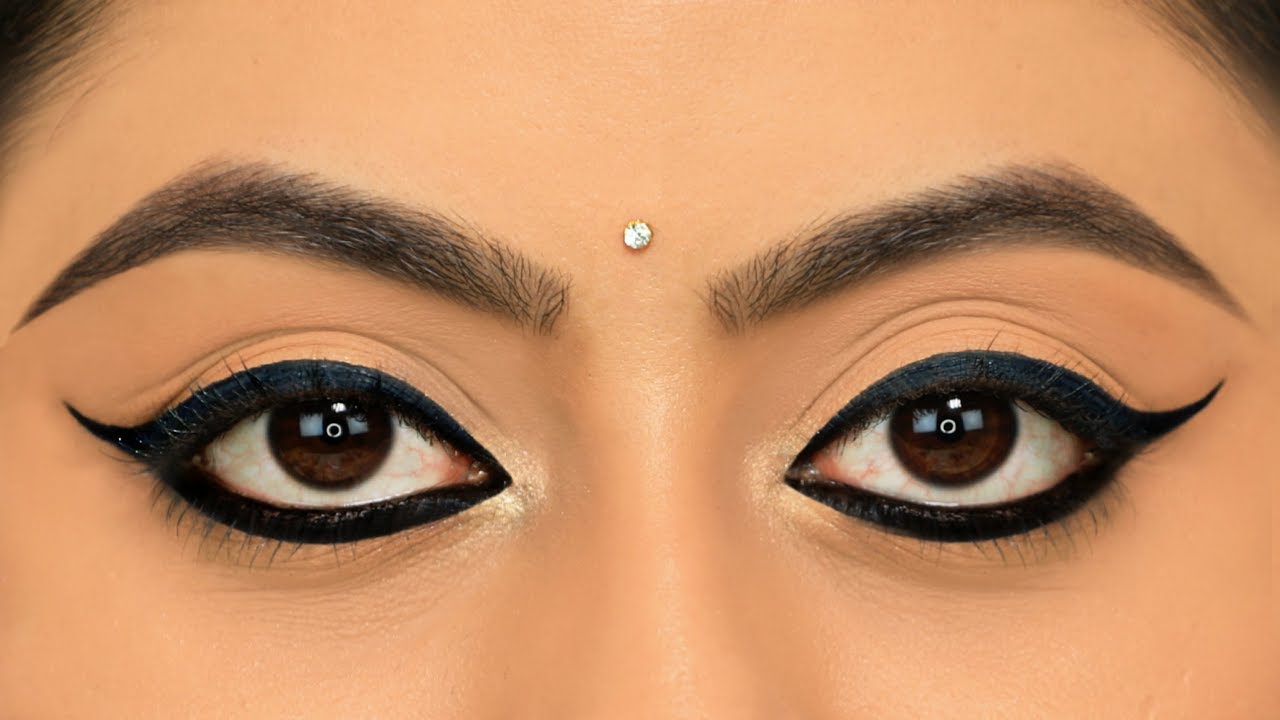
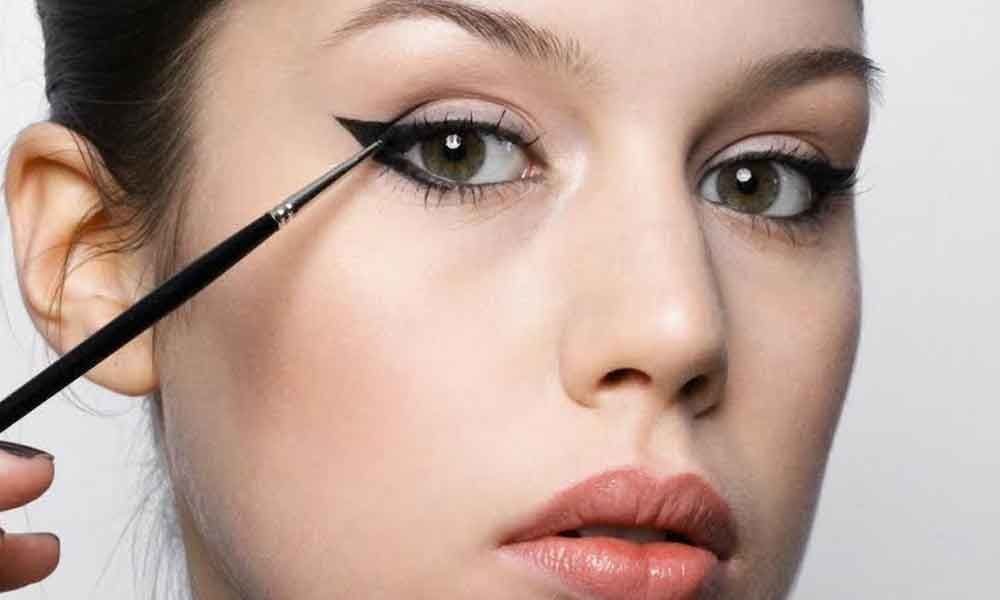
Eye Makeup With Eyeliner And Making Wings On Eyes

Eye Makeup With Eyeliner And Making Wings On Eyes

Eye makeup is necessary. It is only with complete eye makeup that you feel satisfied. But do you know how to use eyeliner? The first thing is to find the right eyeliner and get training on how to improve eyes with makeup.

Let’s start with the essentials that you need to do eye makeup

Essentials:

• Eyeliner
• Primer
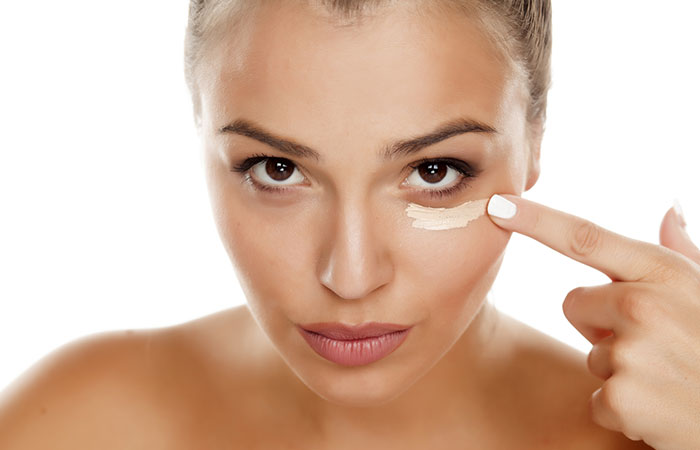
• Concealer

Choose an eyeliner that you are comfortable with. The choice you have are gel, liquid, and pencil eyeliners. So, before you start your training on how to apply eyeliner, you should get some basic education about eyeliners.

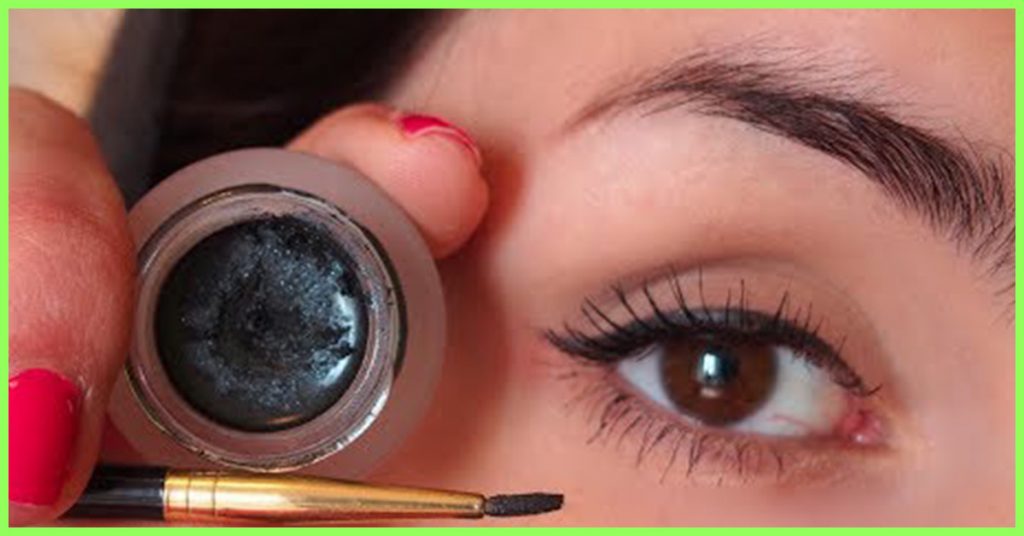
Gel Eyeliner

The first preference of professionals, gel glides smoothly through the eye line. And it saves a lot of time and effort. If you know handle gel, you can do a great job with this eyeliner. It comes in bottles with delicate brushes for smooth application. Or you can buy an elegant brush for your gel eyeliner from the market.

Pencil Eyeliner

If you are a beginner, you should start with a pencil eyeliner. It is so because it won’t let you make mistakes. You will get enough time to balance your hand and see that you are doing the makeup in the right manner. Also, you don’t have to worry about keeping a pencil eyeliner. It is like a pencil that you can conveniently put in your vanity box.

Liquid Eyeliner

Liquid Eyeliner

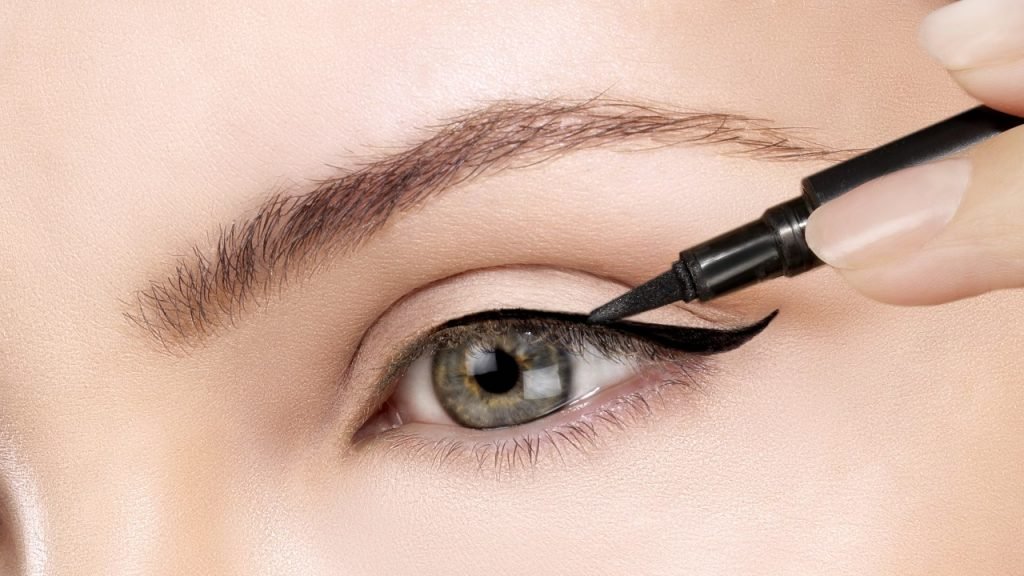
It is a better choice than the gel and pencil because it provides a finish of gel with the convenience of a pencil eyeliner. Also, it comes in two convenient packs. First, you can buy a vial-like bottle that carries a fine dipping brush for smooth application. Second, you have the choice of a marker pen with a felt tip that releases the eyeliner.

Choosing an eyeliner shouldn’t be a hassle after you have the basic information on the varieties of eyeliners available in the market. If you have already used an eyeliner, you can try a liquid eyeliner or go for the gel to get a perfect finish. But if you are buying your first eyeliner, then buy a pencil that is more convenient to use.

How To Apply Eyeliner – Step-By-Step Tutorial

Step 1: Prepare Your Eyes

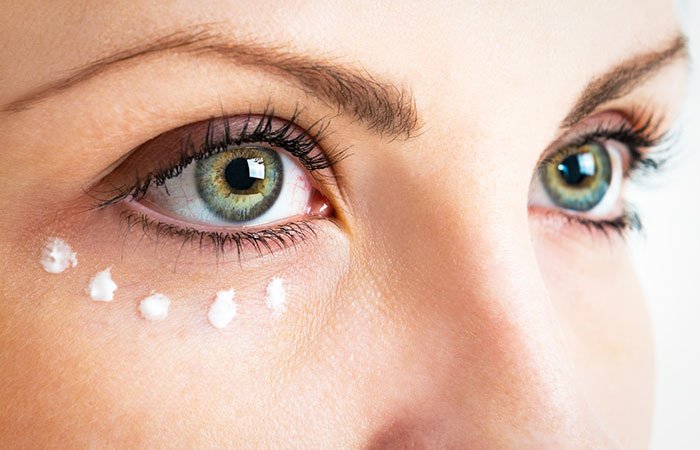
It is an important step but it is often overlooked. Before you start applying eyeliner to your eyes, you should first clean your face and eyes. Cleaning is necessary to remove dirt, grime, and pollutants from the skin. Also, treat your face with a gentle moisturizer and a cream around the eyes.

Skin treatment around the eyes is necessary to reduce puffiness that can spoil the look. The treatment would even out any discoloration near the area and prevent premature aging with wrinkles and fine lines. Also, cleaning and treating your eyes will improve the radiant glow on your eyes.

Step 2: Start With A Clean Base

Cleaning would only remove pollutants from the skin. But you need to do more to prepare your skin to accept makeup. Here … Find more
Relationship Stages You Should Know About

6 Relationship Stages You Should Know About

Starting a relationship is easy but sustaining it is challenging. There are ups and downs in every relationship, but some relationships fall under pressure or head in different directions. Largely a relationship passes through six stages before it becomes mature.

The first stage is called euphoric or honeymoon because it is a fresh start where you have positive thoughts, and dream of a bright future ahead. It is the stage where you feel happy in the company of your partner. But little do you know that soon you will have to face challenges and if you are unable to sustain those challenges, your relationship would end abruptly.

  1. Euphoric Stage
Euphoric Stage

According to science, it is a make-believe stage where you believe only in the facts presented before you. It is an overdose of love that prevents your brain from taking note of red flags and incompatibilities that could create challenging situations in the long run. The cocktail of happy hormones like oxytocin, dopamine, and endorphins would take you in a state of infatuation.

What To Do?

First, you should enjoy the stage you are in. Go on dates and exchange gifts. But don’t ignore the red flags like possessive behavior and stubborn nature. Also, take some time to think about whether the person could become a reliable partner in life.

  1. The Early Attachment
The Early Attachment

This stage comes when the ventral pallidum of the human brain becomes active because of high love doses. The ventral pallidum is the part that handles feelings and attachments. This stage shows that you have graduated from the honeymoon stage and that you are ready to move on with your relationship. But here you become some realistic about your partner.

What To Do?

You realize that you and your partner are two different individuals with different needs. Also, it can be said that you start realizing that challenges would come and that you should be ready to face challenges to grow your relationship. The good thing is that you have already covered some distance together without facing any challenge.

  1. Crisis
Crisis

The honeymoon period is over, and your relationship enters a deeper stage where you try to accommodate your partner in your life. It is the doubt and denial stage. For example, you are asked to spend more time, but you deny them due to your busy work schedule. Now you can see the gray side of your partner.
What To Do?

Here you need to behave like a conflict manager. You need to know how to de-escalate the tension and bring normalcy to the relationship. The first thing is to respect the emotions of your partner and look at their positive side. Challenges would come and if you aren’t ready to face challenges, your relationship is bound to suffer.
  1. Disillusionment
Disillusionment

It is a stage where you start feeling suffocation in the relationship and want to come out of it. Here you can put a full stop to the relationship and move on. But it isn’t the right … Find more